 screenrove
Stripe / Configuring a checkout in Stripe's demo
Logged-out desktop capture of stripe.com/gb (home, pricing, Payments) and two public product surfaces: the checkout.stripe.dev payments demo and docs.stripe.com. No account was created, the Dashboard was not opened and no email, card or test-card data was entered anywhere, so sign-up, onboarding and the signed-in Dashboard are not captured. The demo was driven only through its own settings (toggles, theme, device, demo type); marketing figures and customer stories change over time.
1. Demo chooser
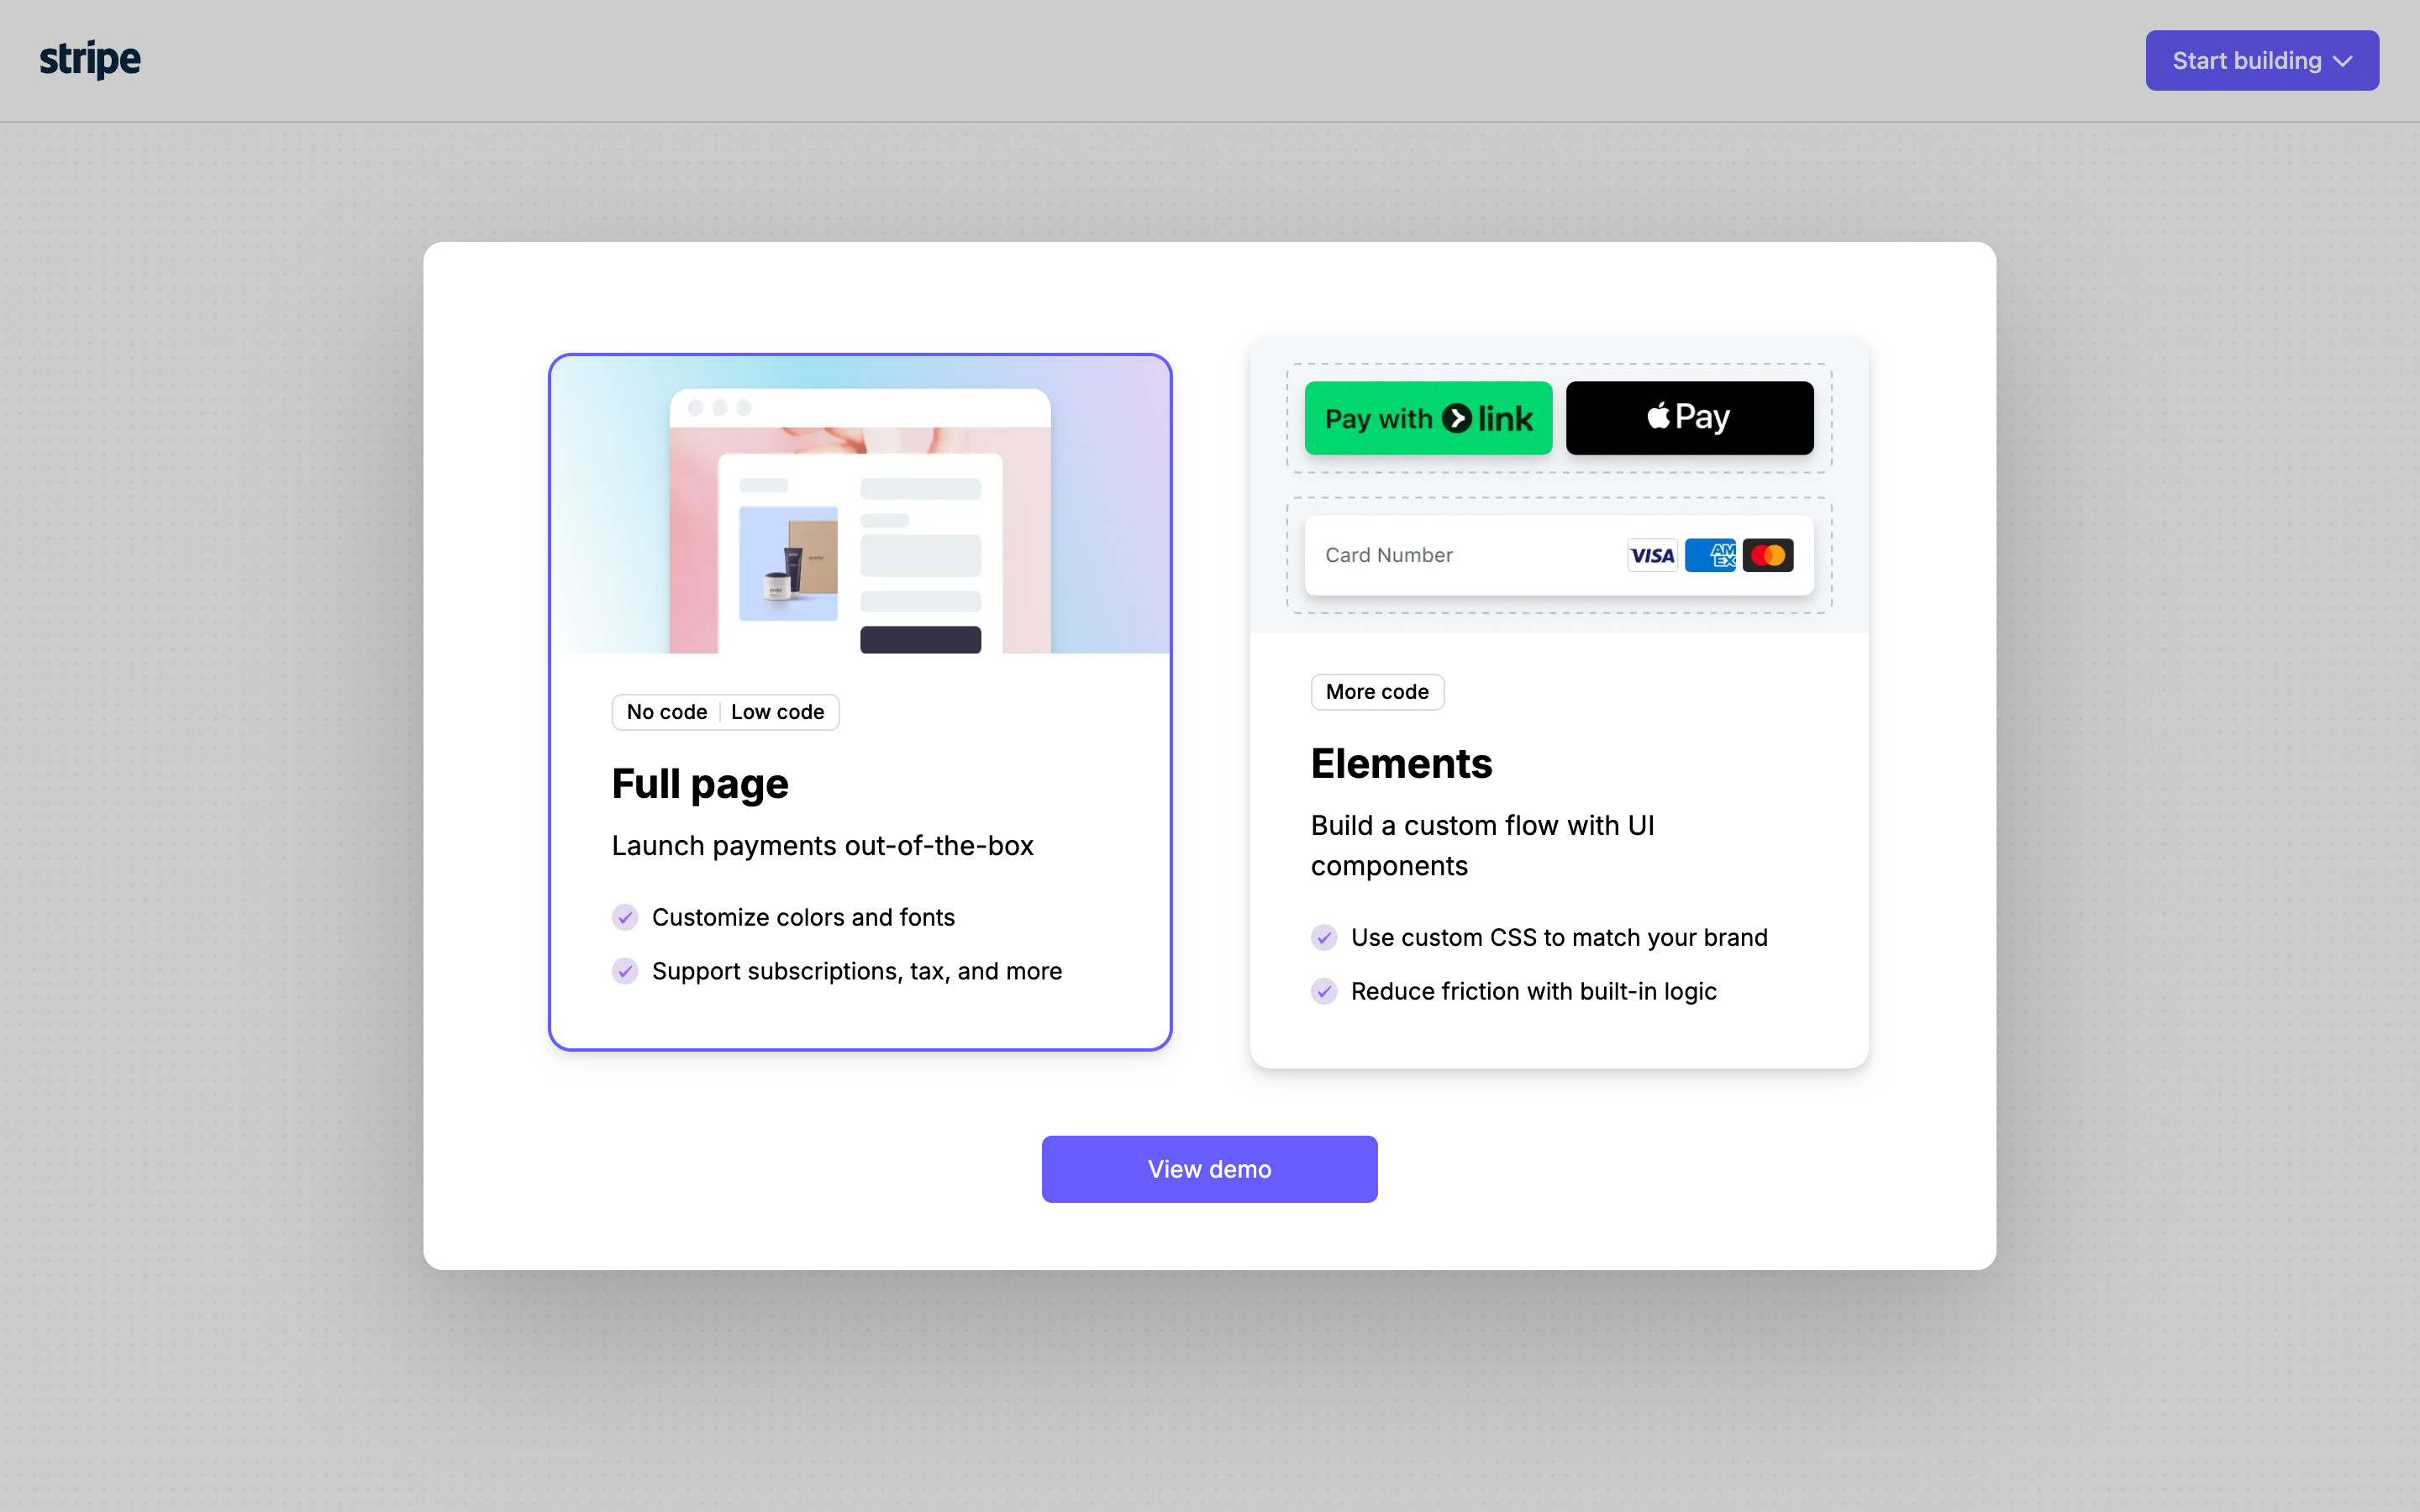
Stripe's public payments demo opens on a centred white modal over a grey dot-grid page. Two selectable cards: Full page ("No code | Low code" tags, a hosted-page illustration, two checkmark bullets) and Elements ("More code", Link, Apple Pay and card-field illustration). Full page is selected by default with a purple outline; one purple View demo button sits below.
- View demo with Full page selected → Full page demo
- Select Elements, then View demo → Elements demo
- Start building → Not explored from this screen
2. Full page demo, default settings
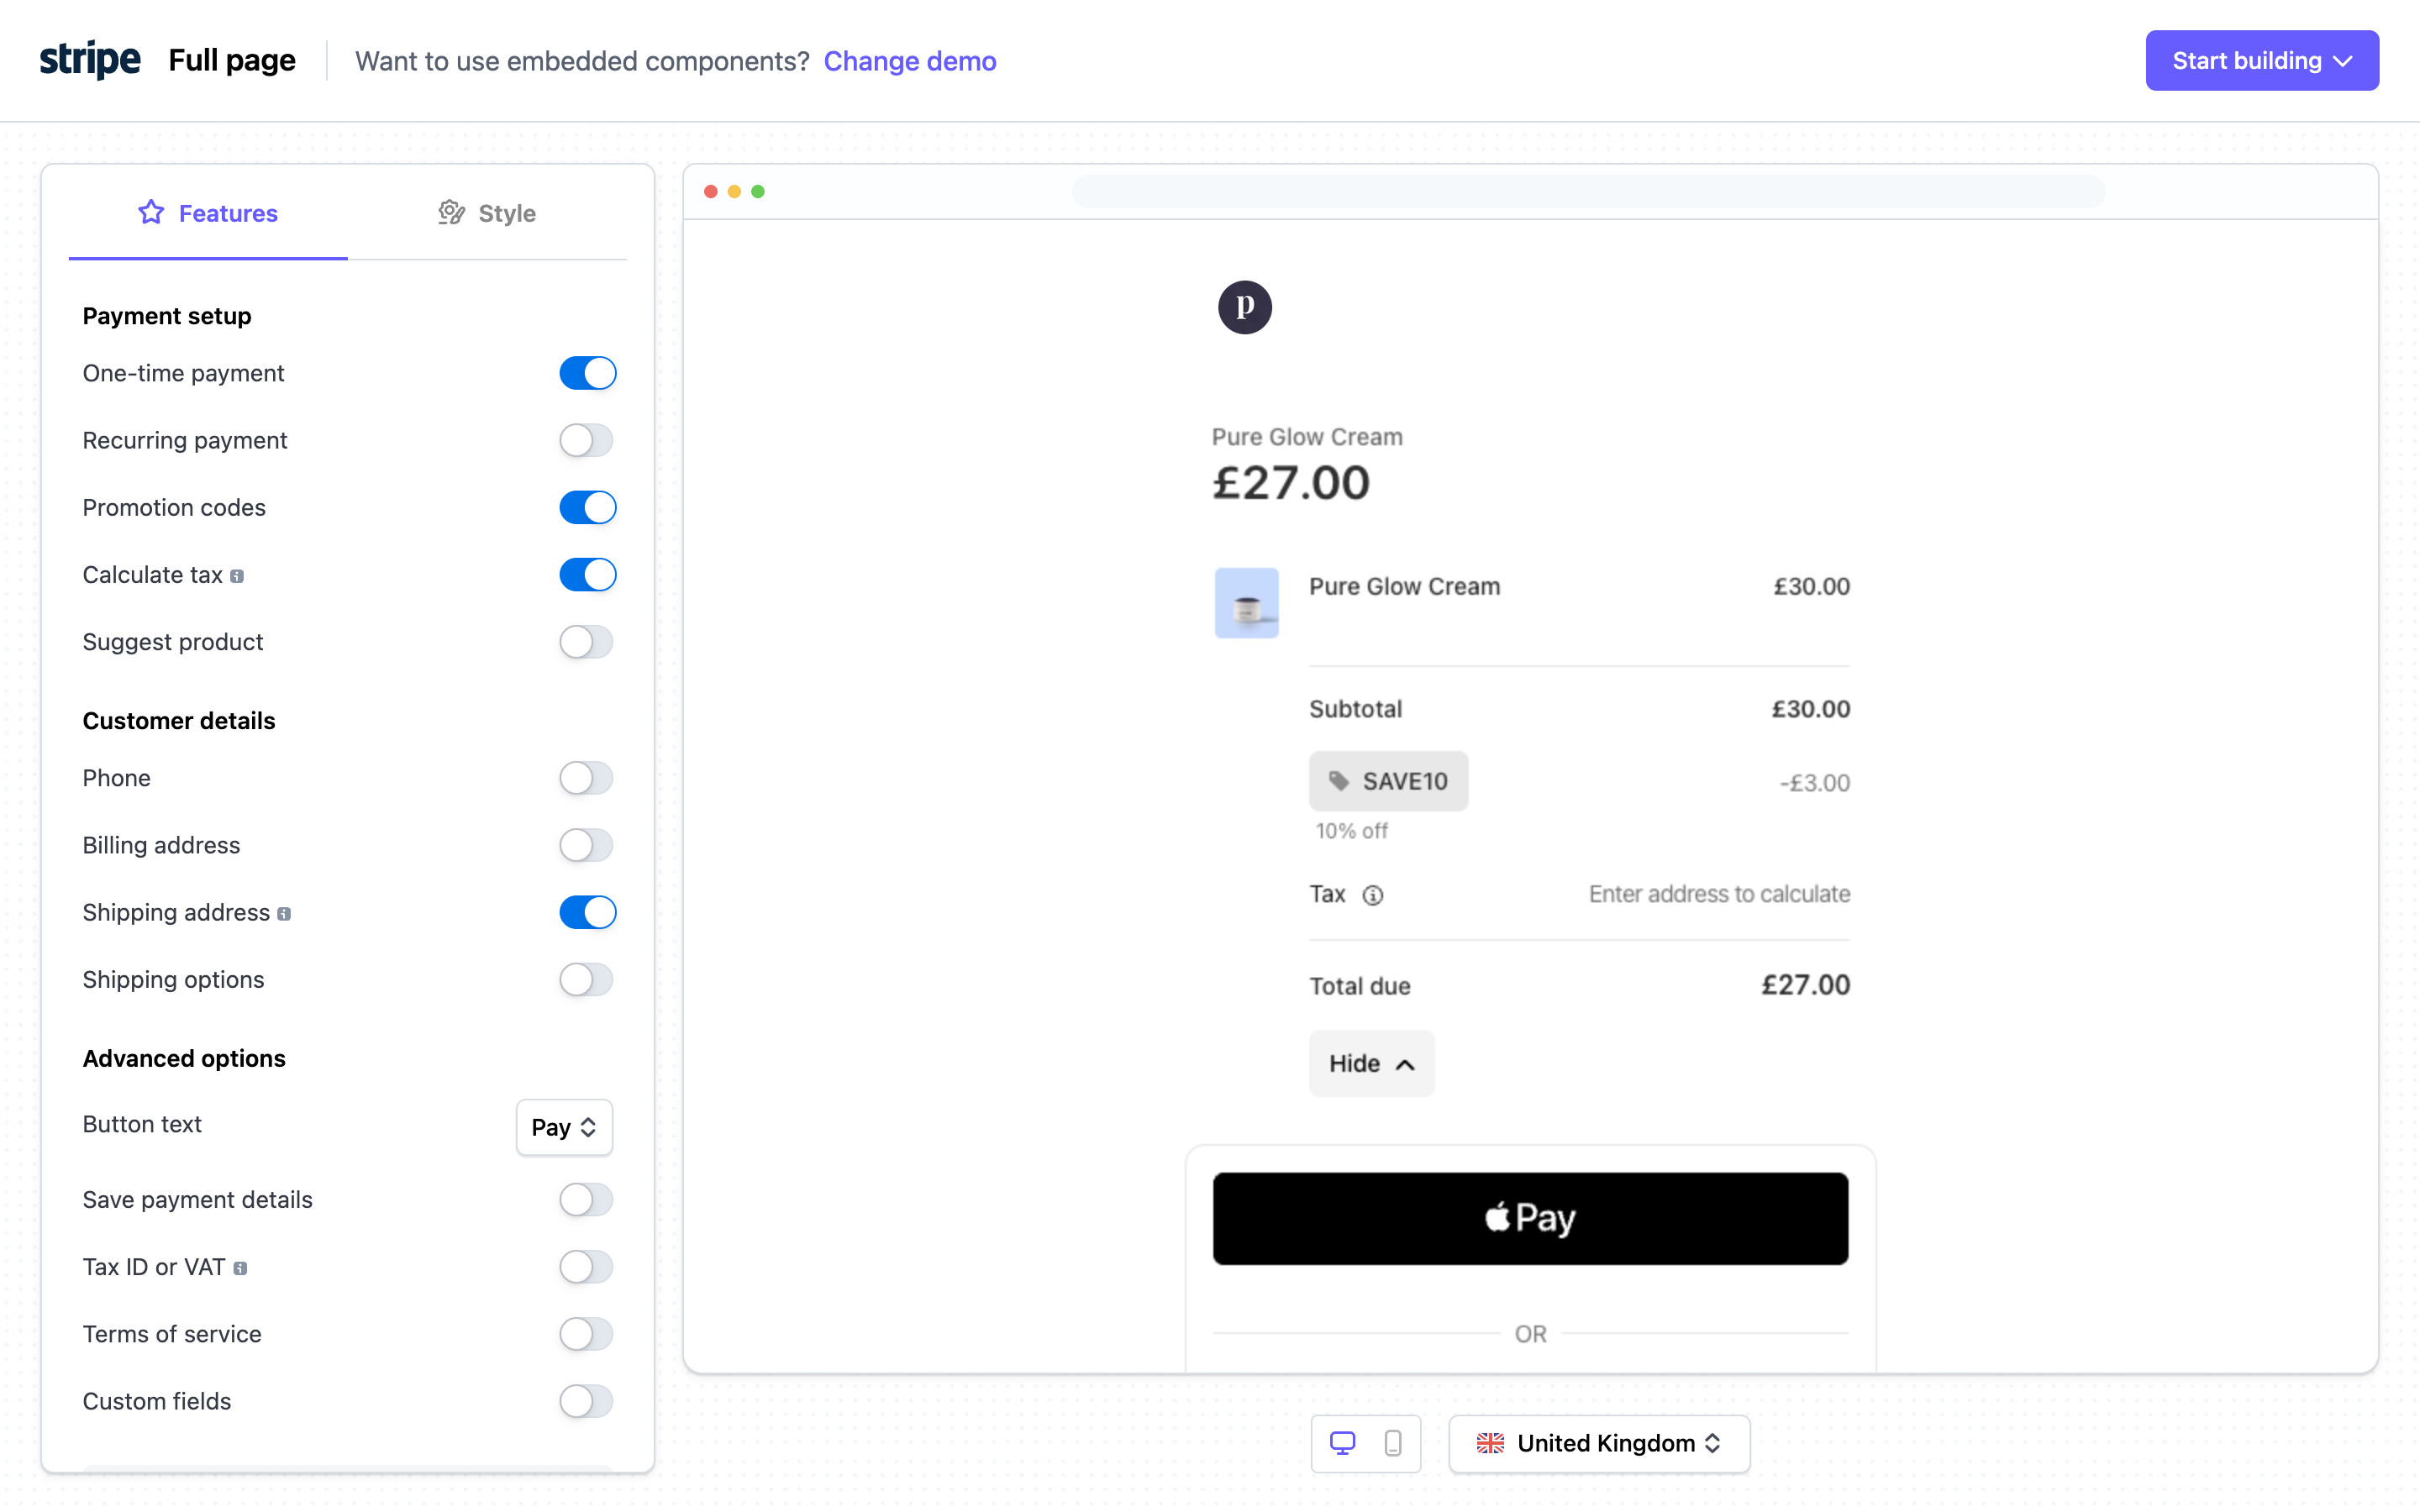
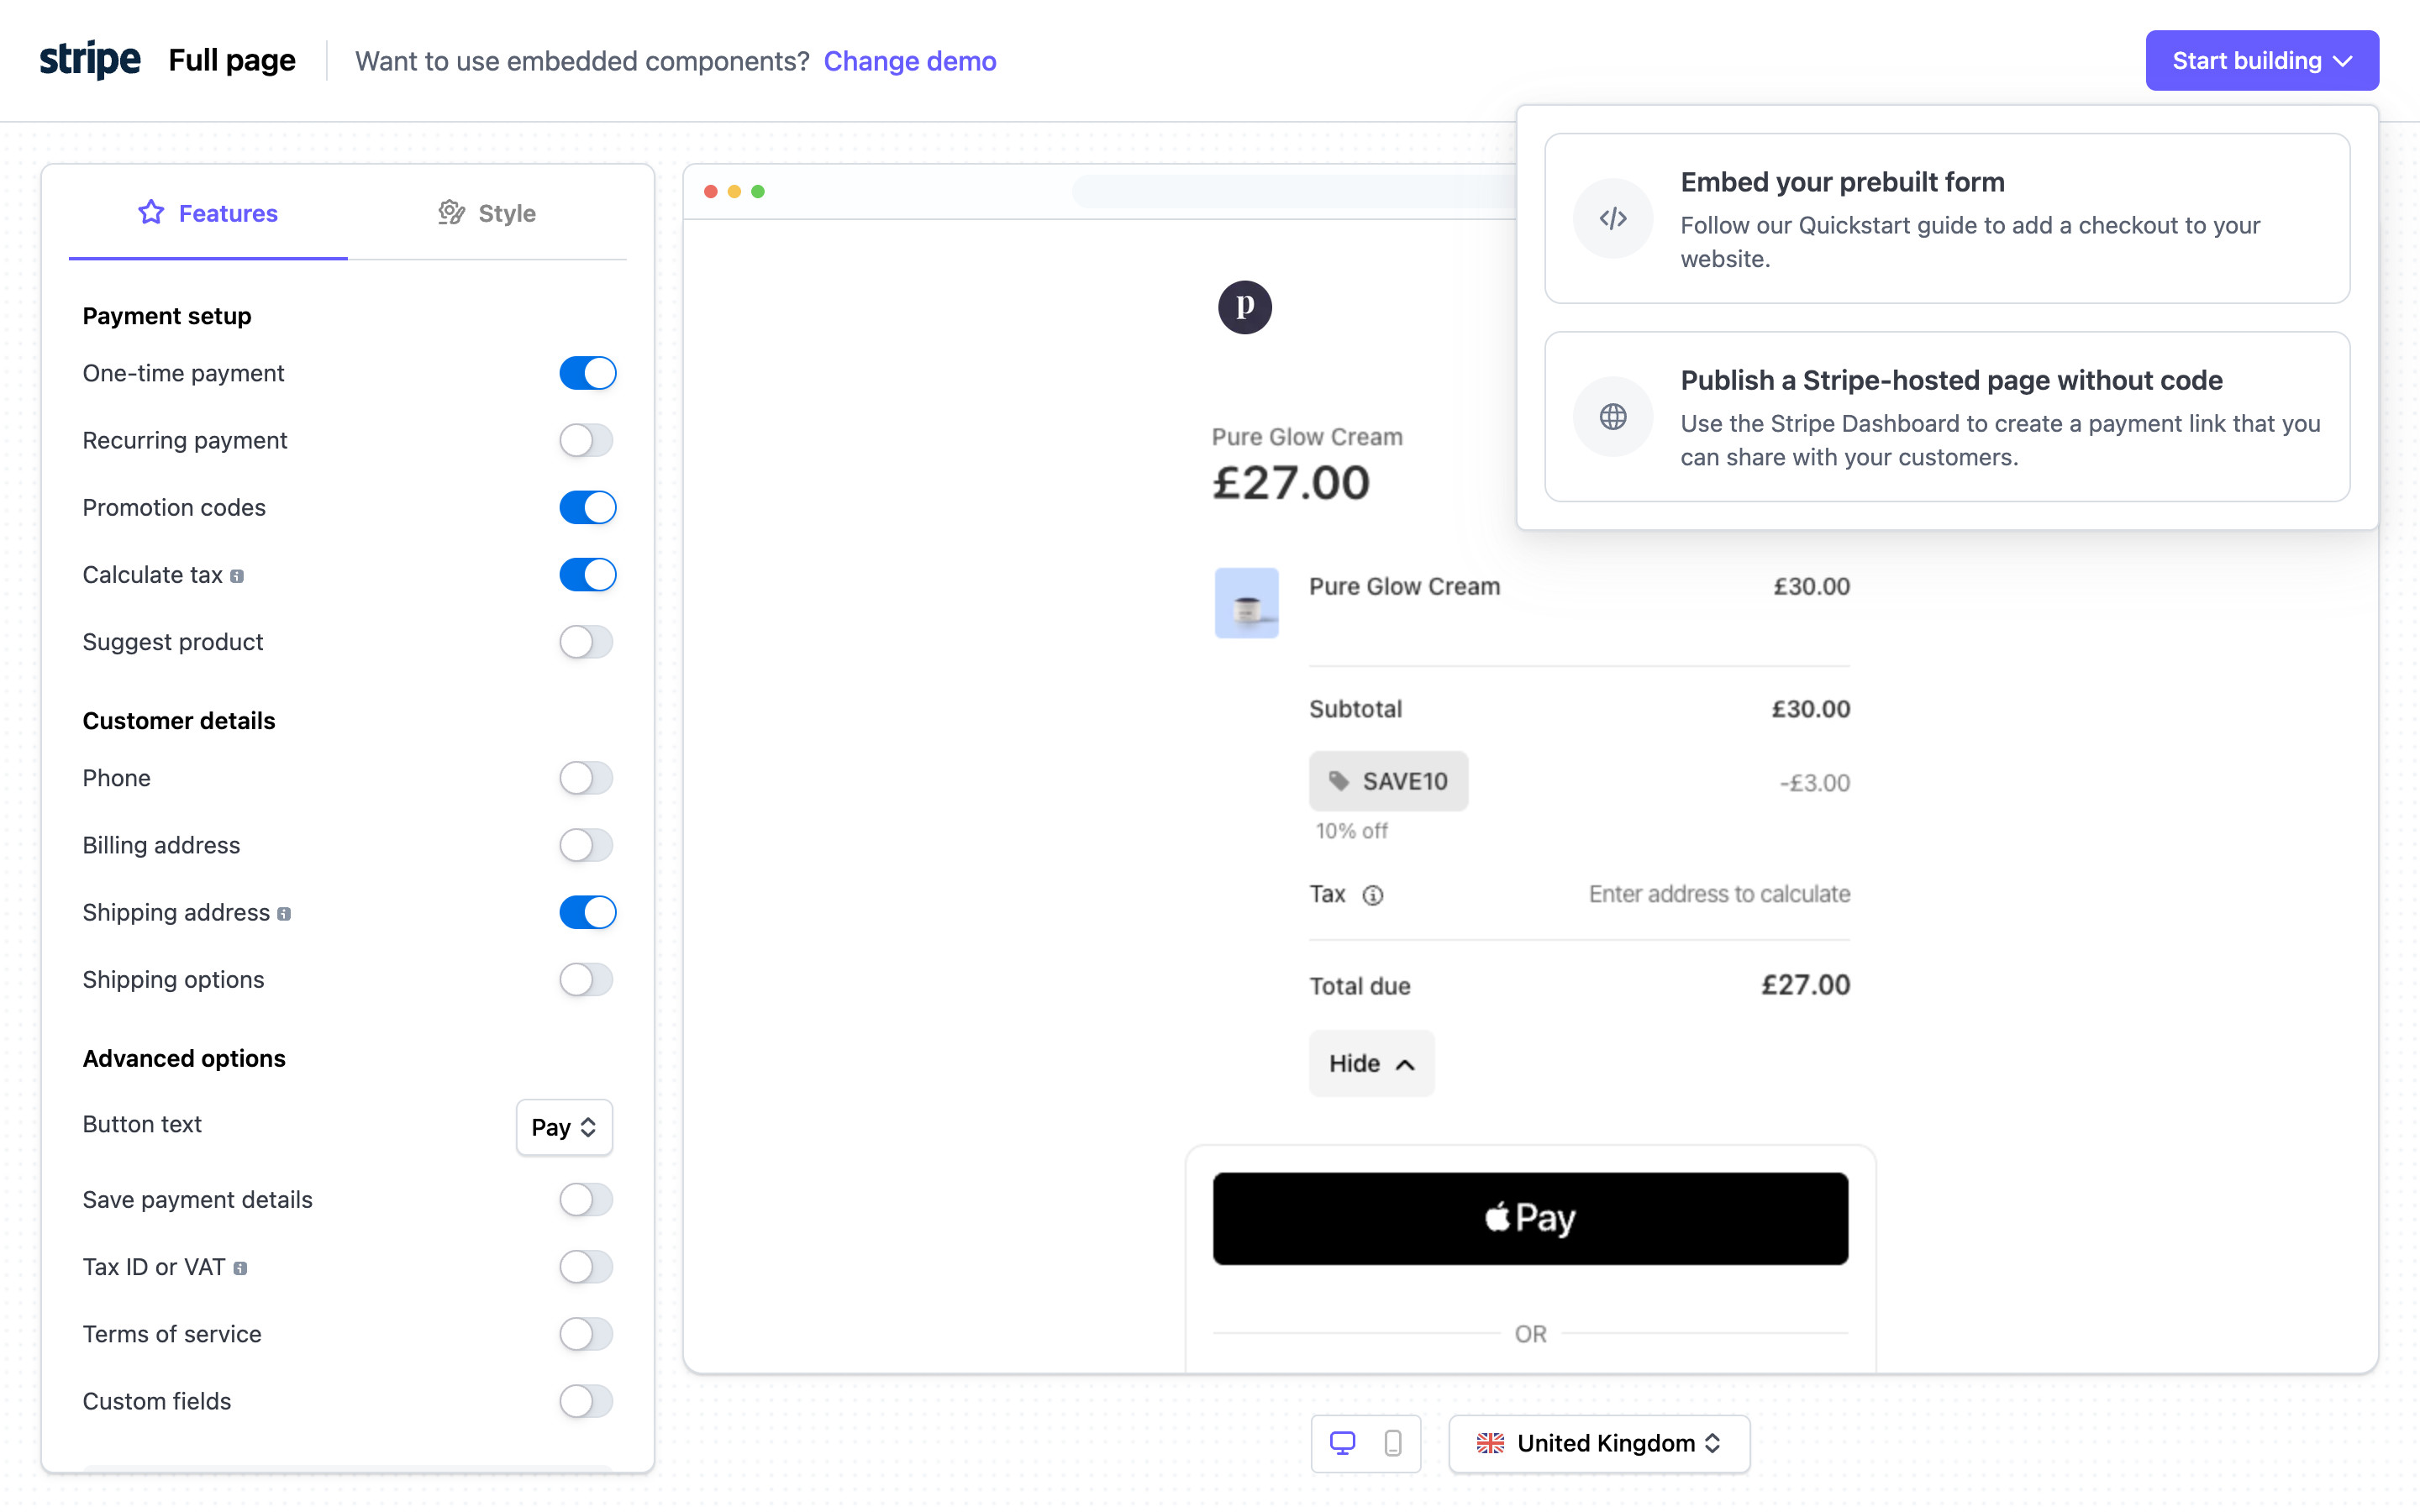
A two-pane playground. Left: a Features / Style tabbed sidebar with toggle rows under Payment setup, Customer details and Advanced options (One-time payment, Promotion codes, Calculate tax and Shipping address are on). Right: a browser-frame preview of a hosted checkout for "Pure Glow Cream" at £27.00 with a SAVE10 code applied (−£3.00), tax "Enter address to calculate", and an Apple Pay button. A desktop / mobile toggle and a United Kingdom country picker sit under the preview.
- Turn on Recurring payment → Recurring payment on
- Open Start building → Start building menu (branch)
- Open the Style tab → Style tab
3. Recurring payment on
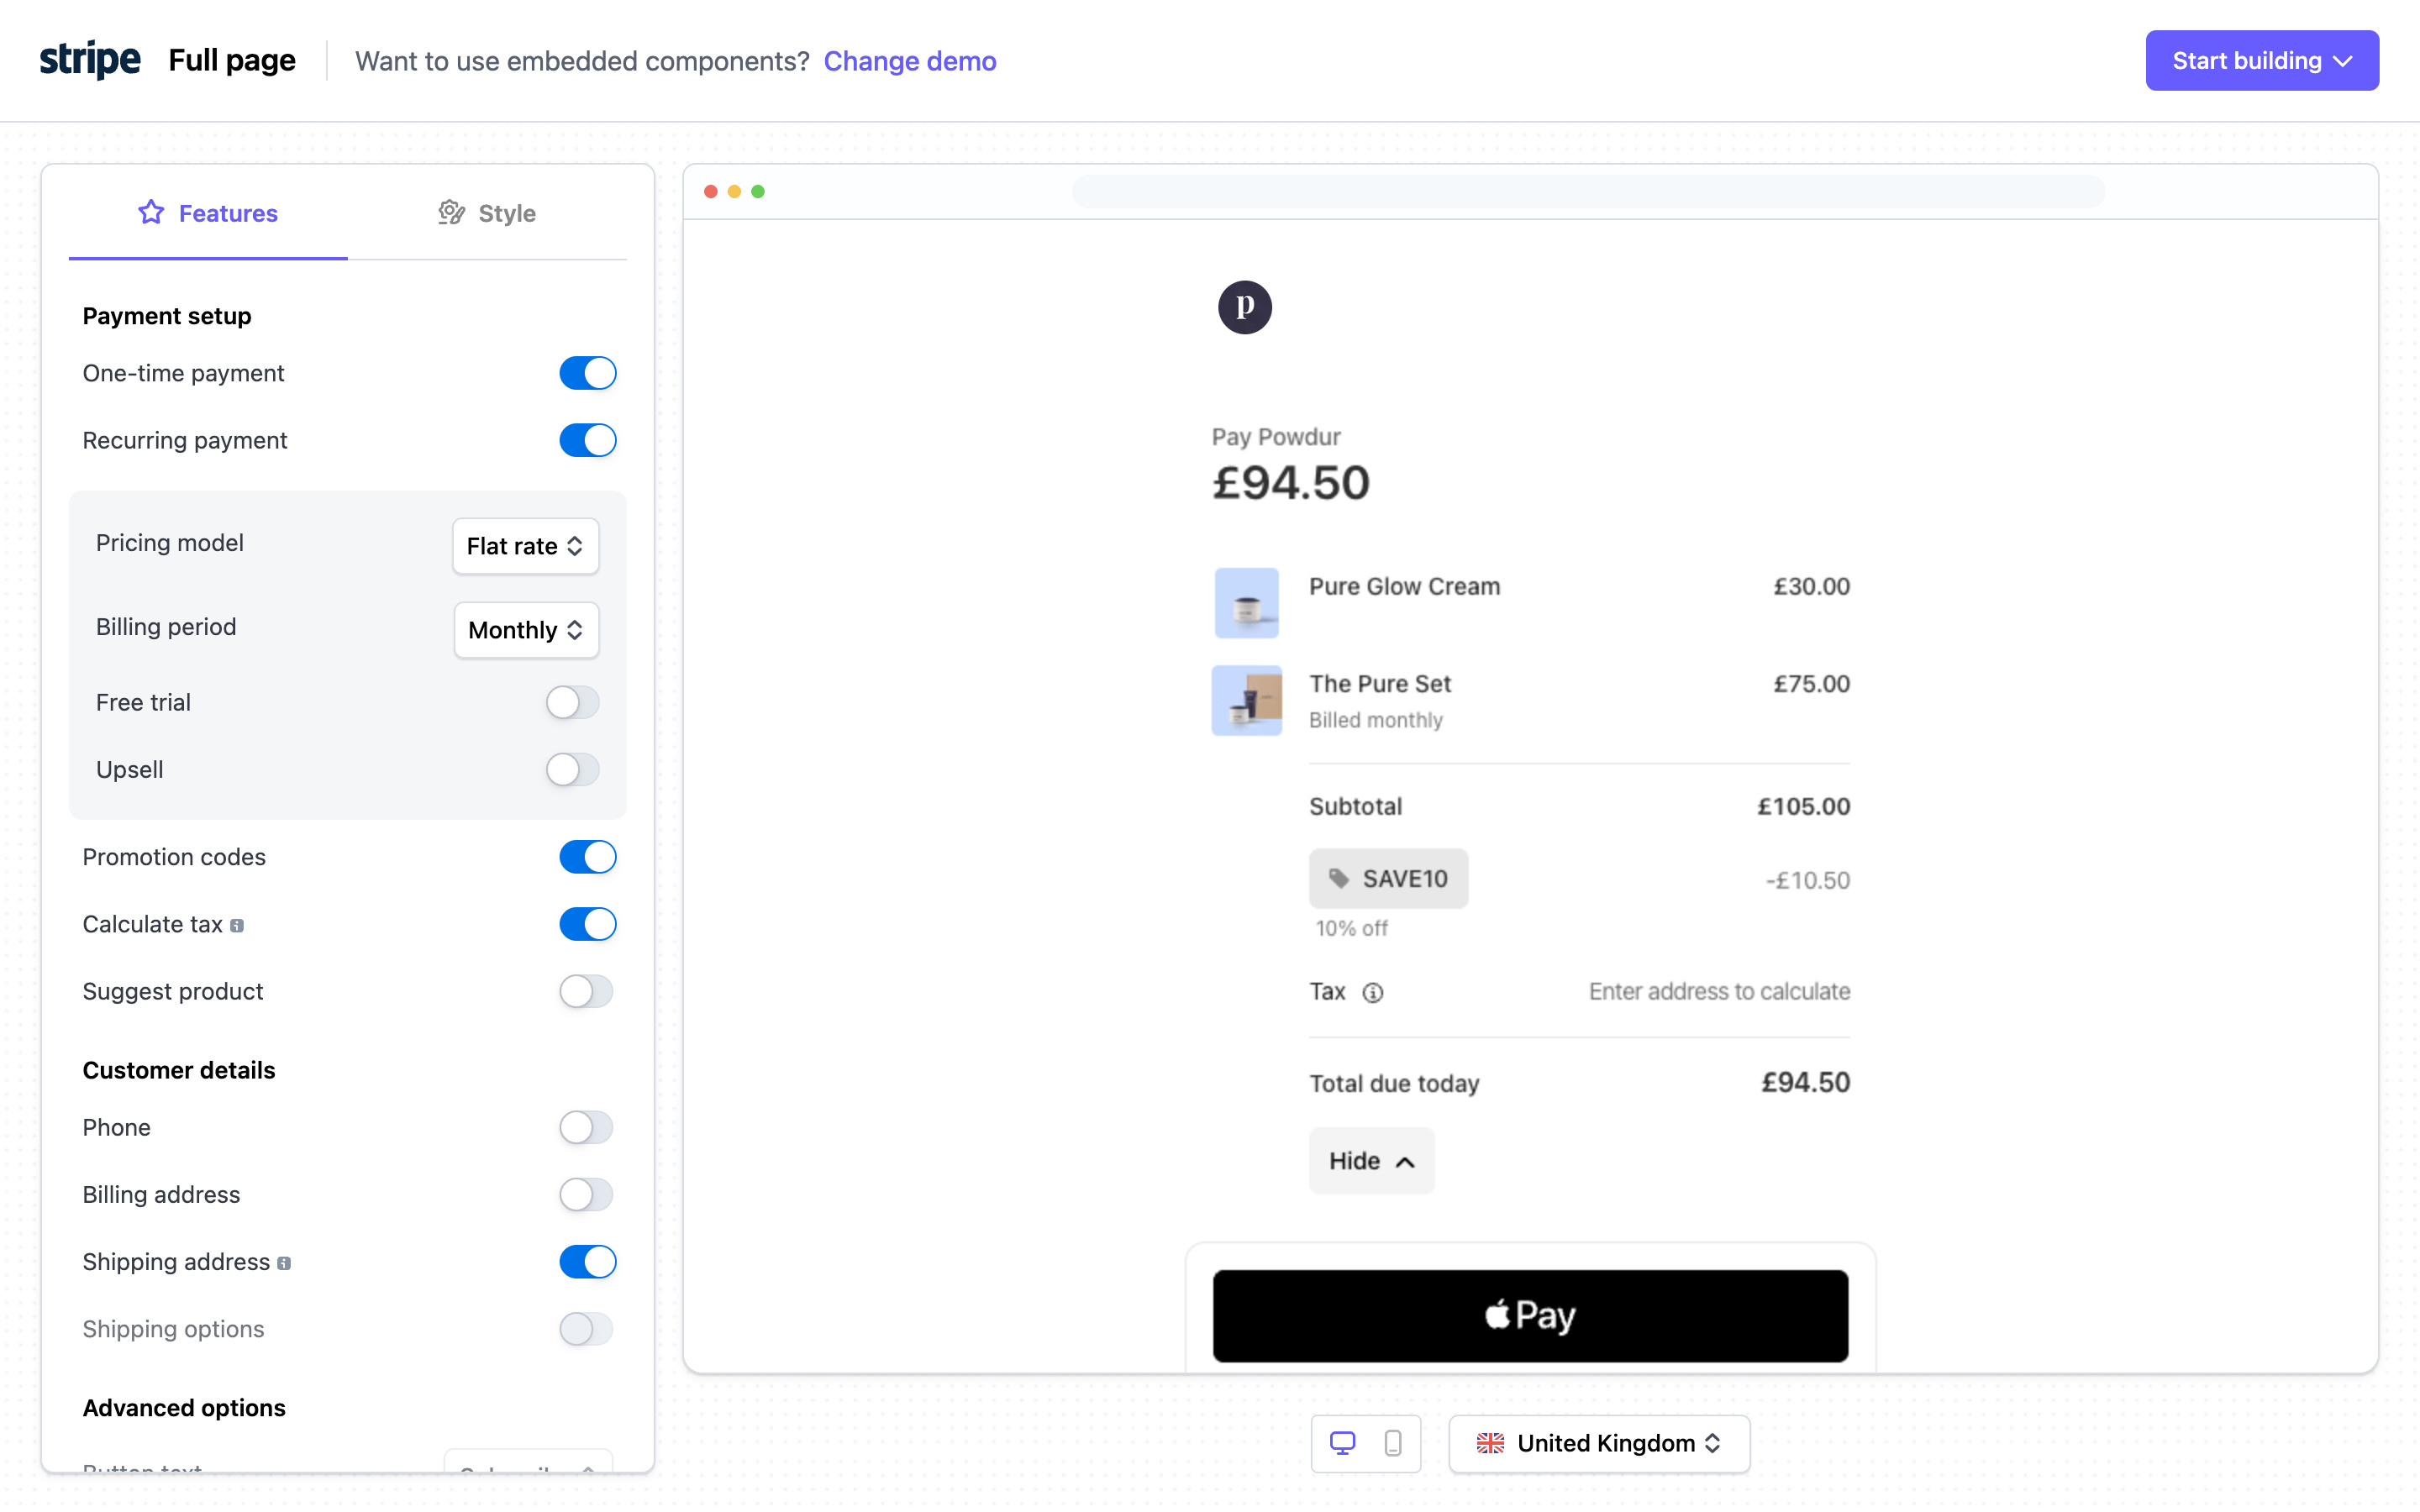
Turning on Recurring payment opens a nested group (Pricing model: Flat rate, Billing period: Monthly, Free trial and Upsell toggles). The preview updates to "Pay Powdur £94.50": Pure Glow Cream £30.00 plus The Pure Set £75.00 "Billed monthly", subtotal £105.00, SAVE10 −£10.50 and "Total due today".
- Open the Style tab → Style tab
4. Style tab
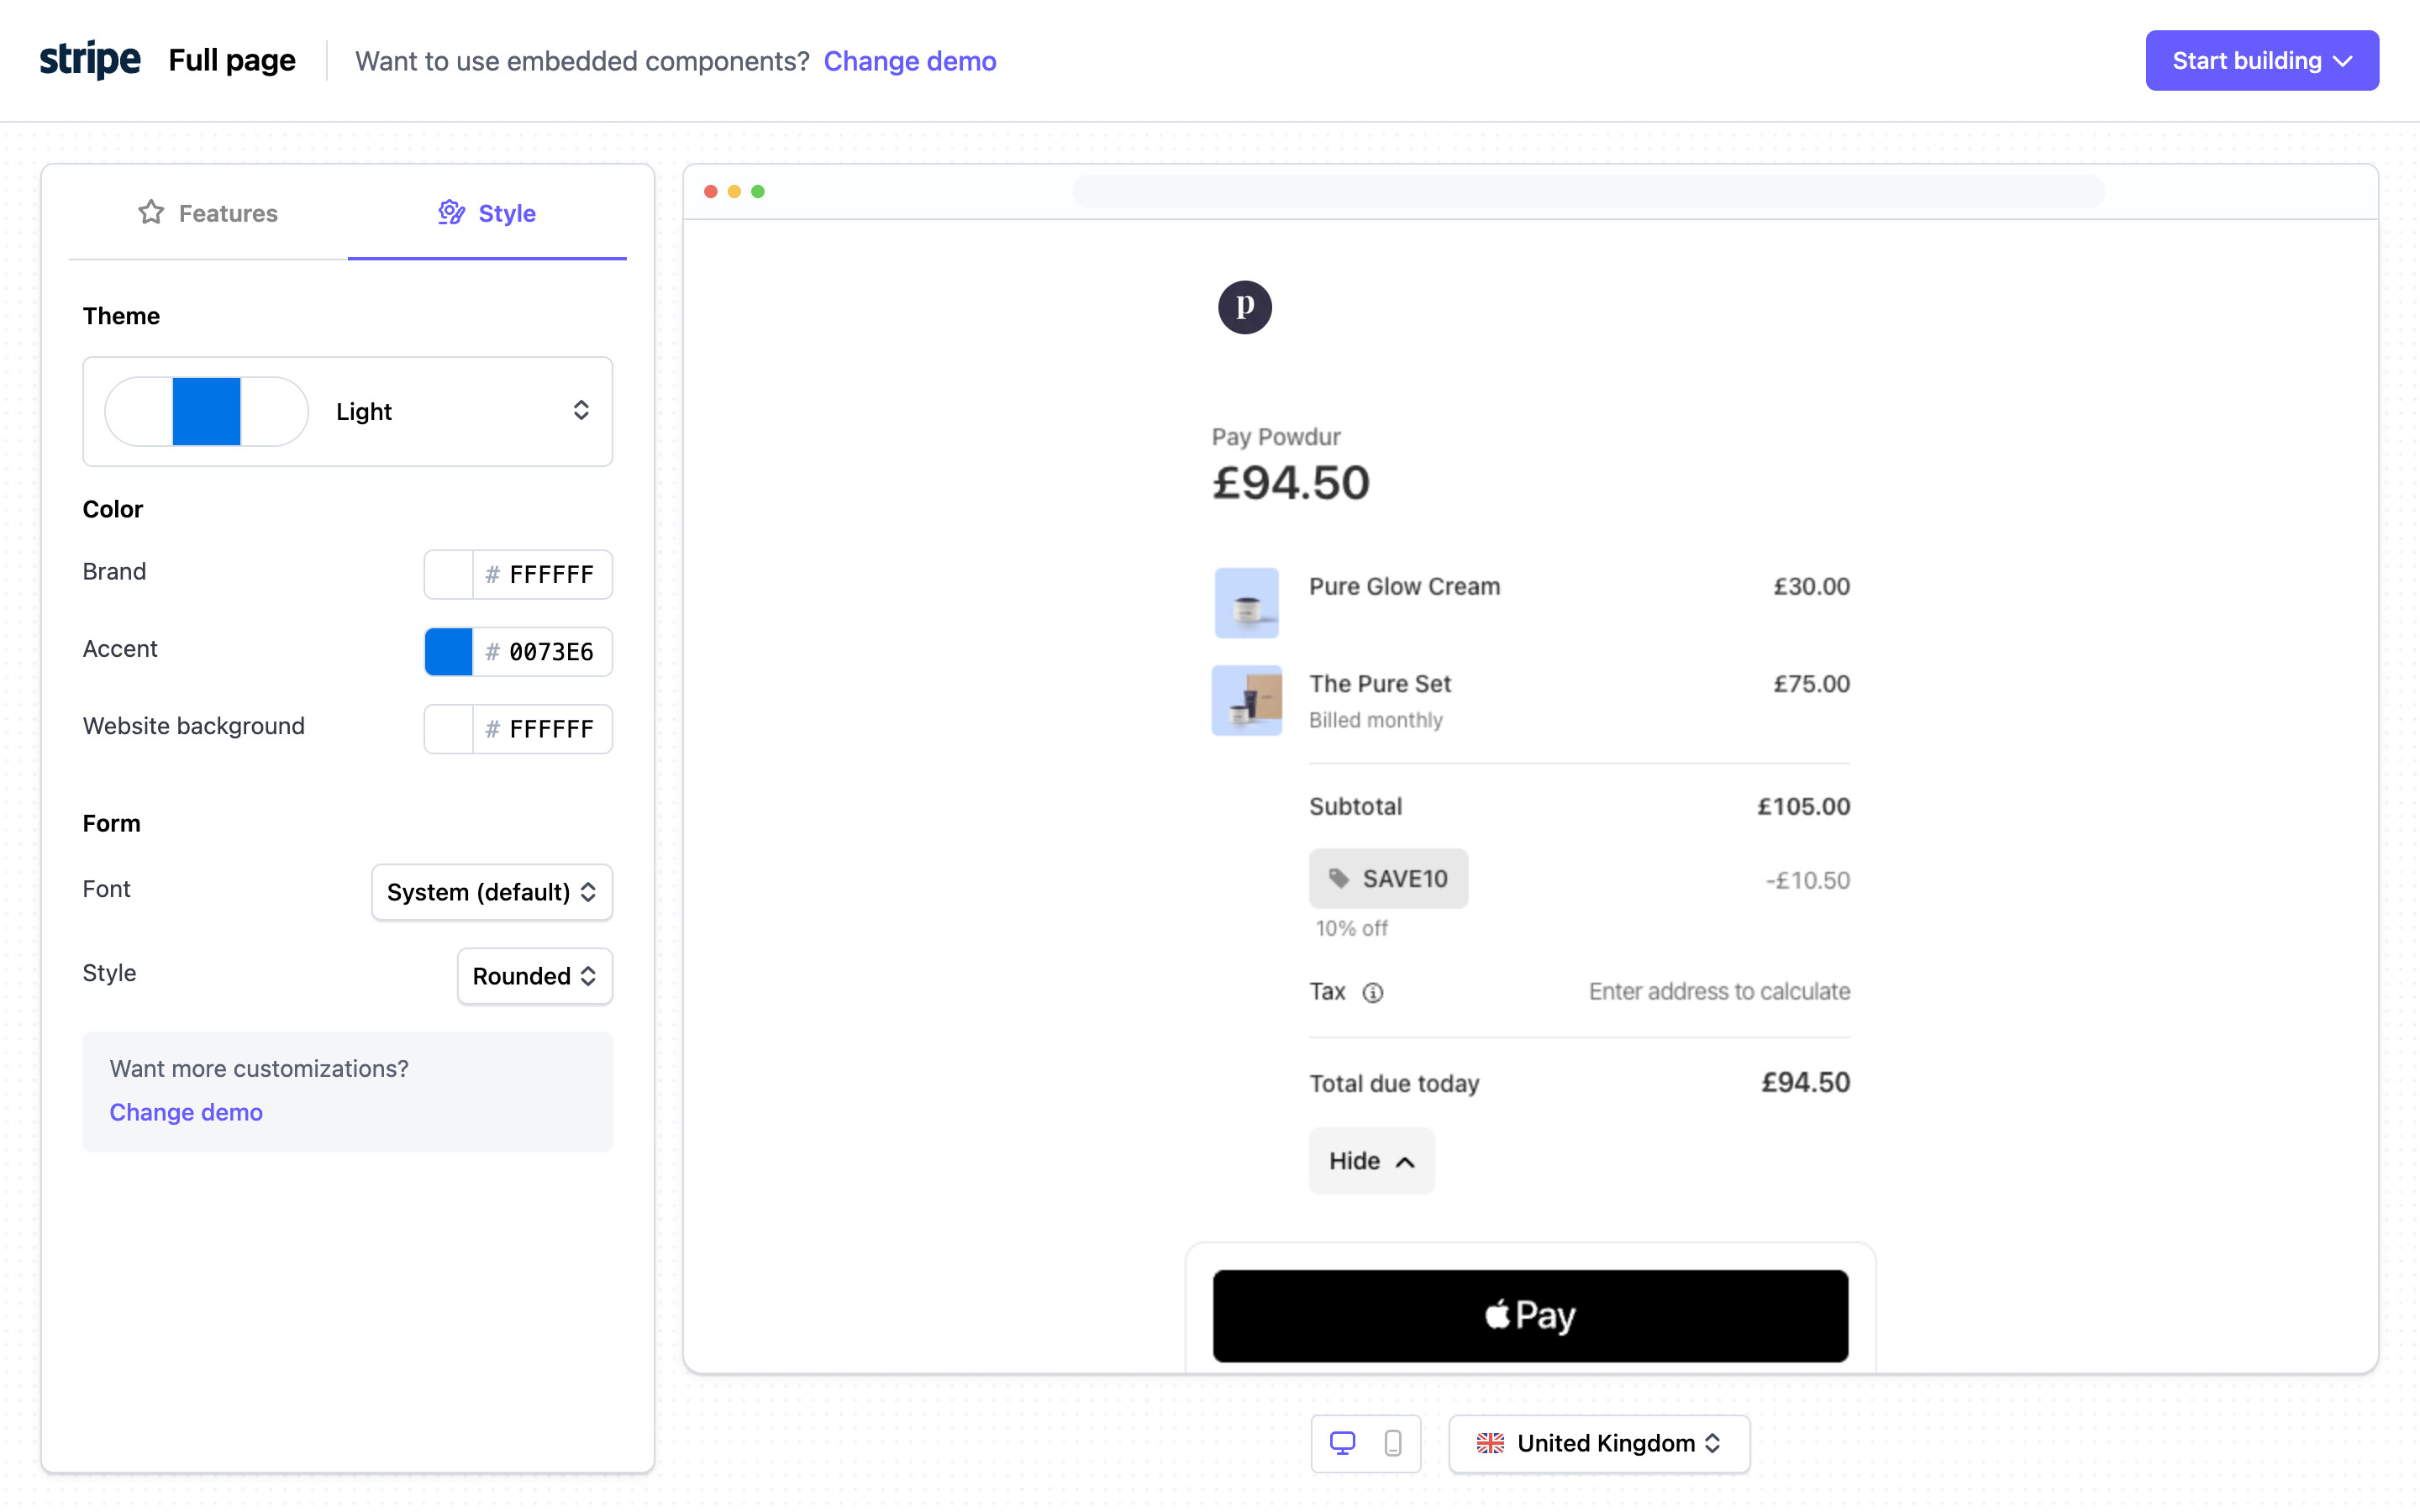
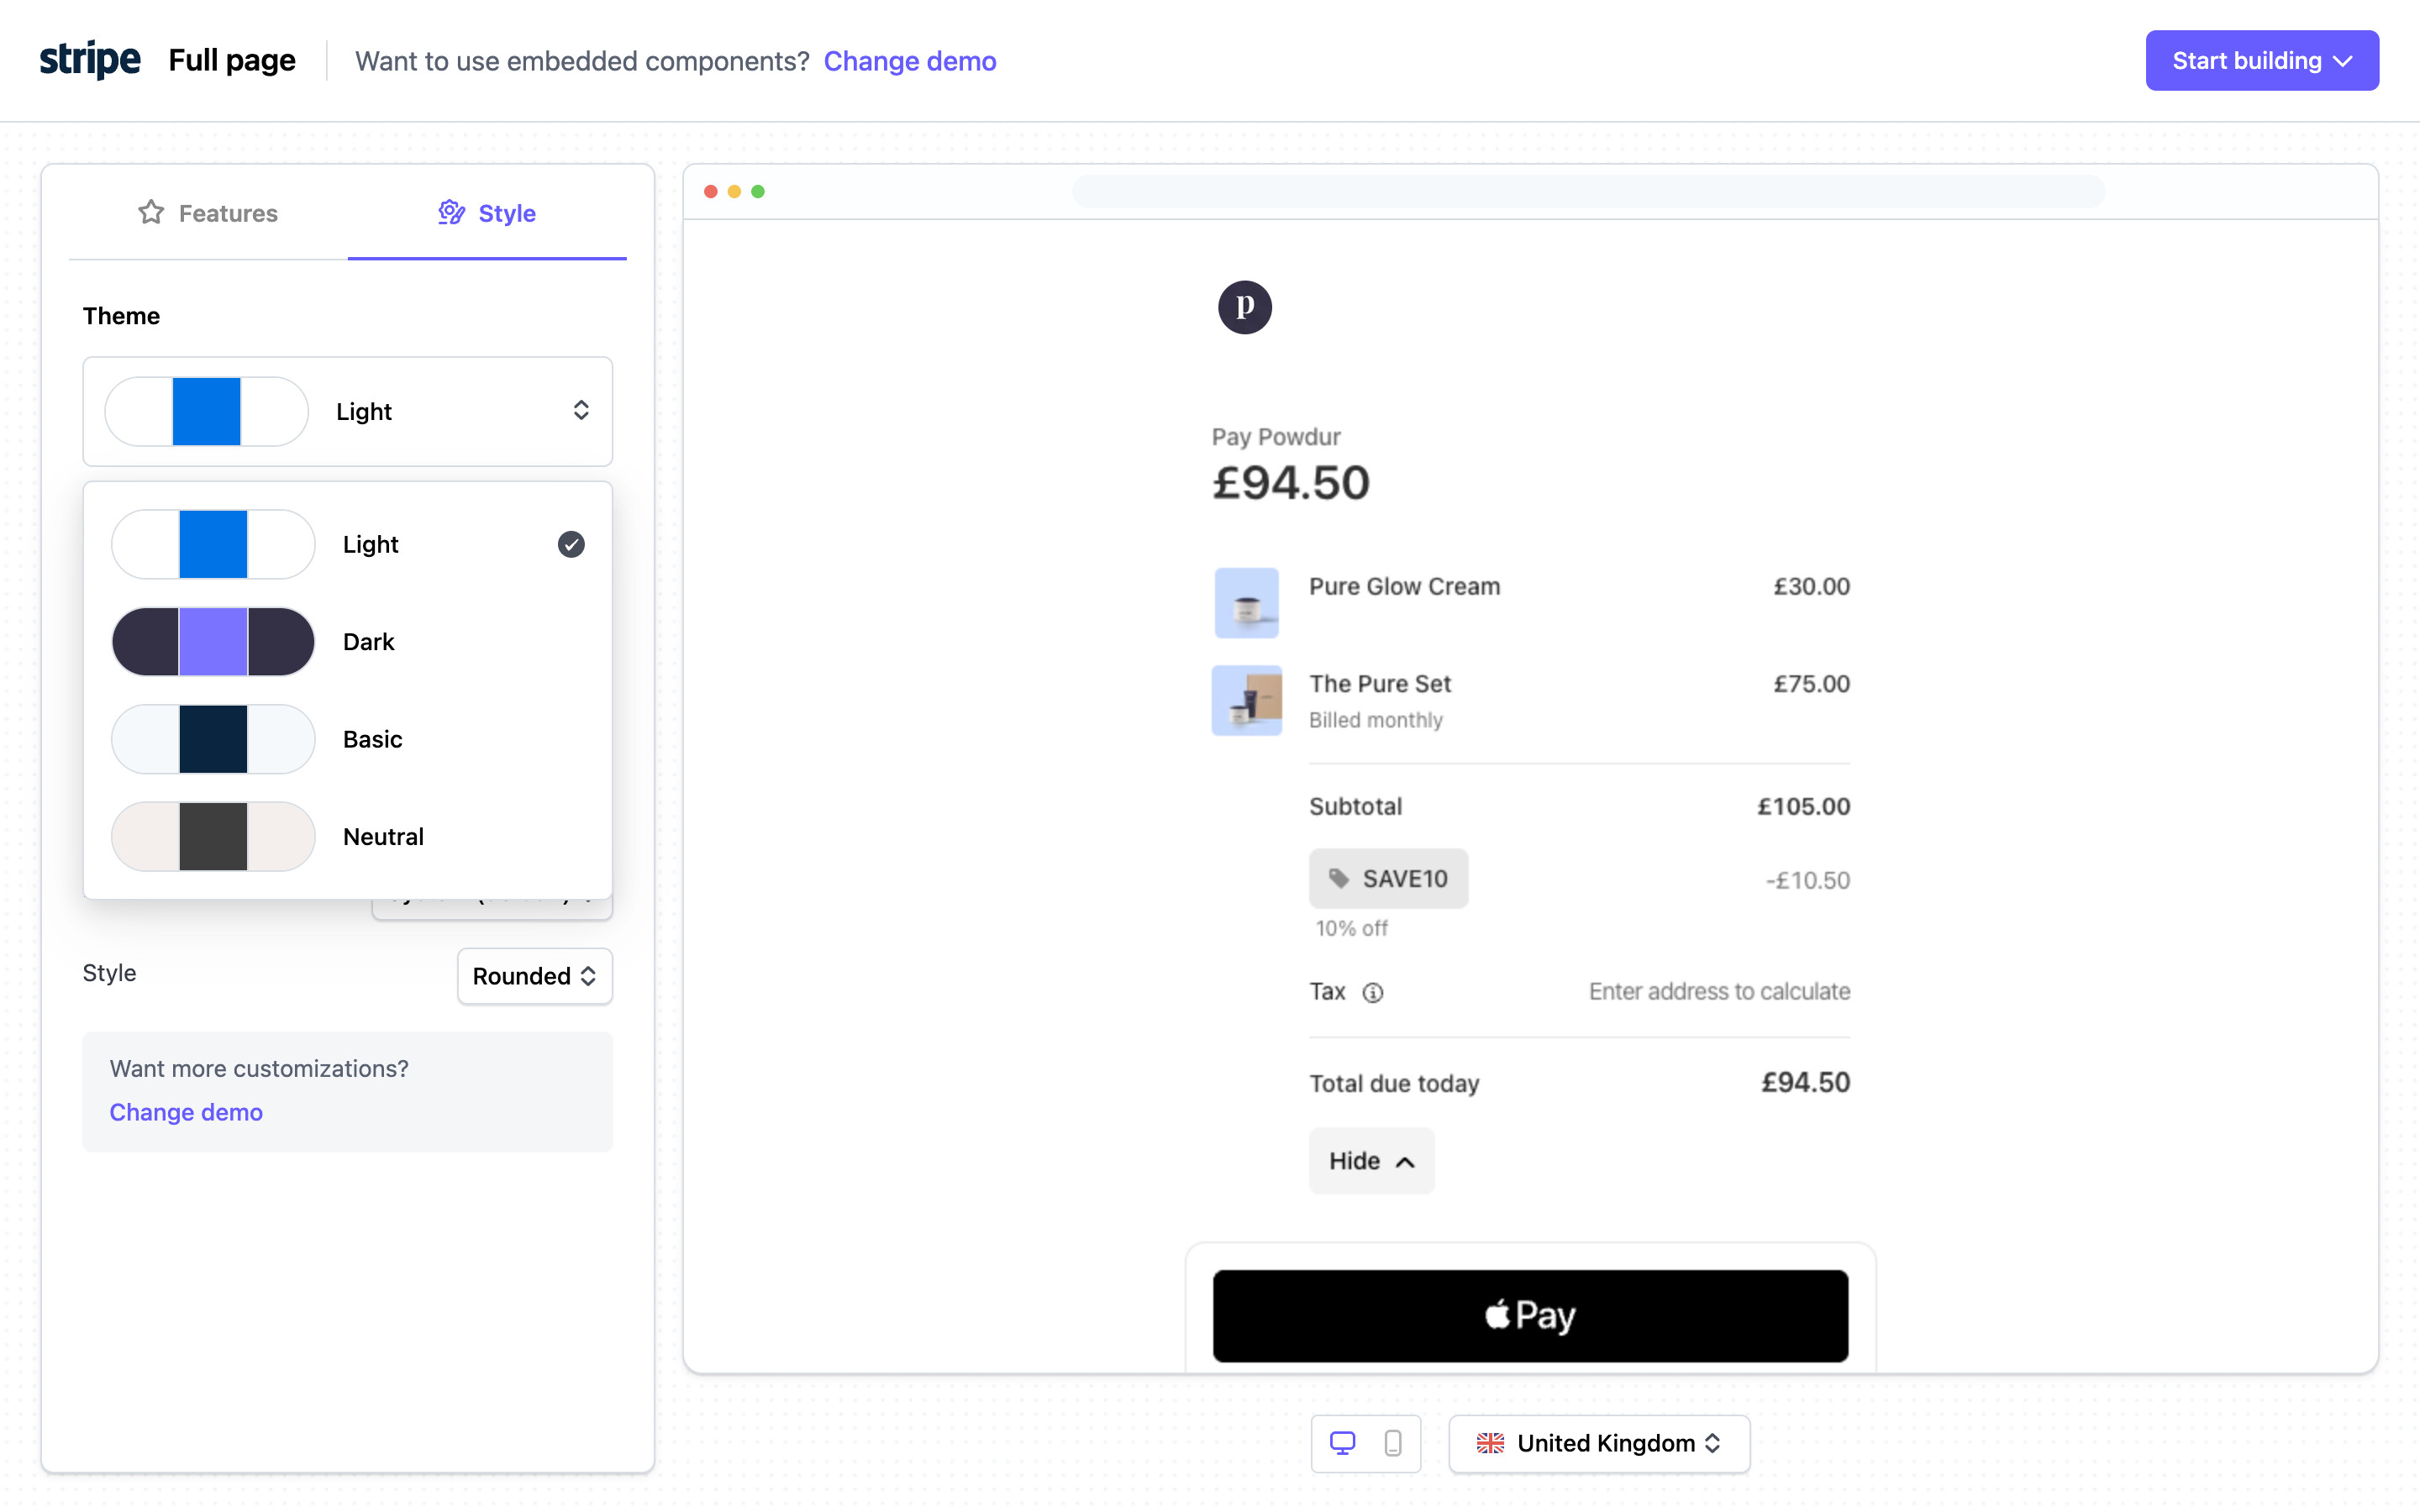
The Style tab replaces the toggles with Theme (a swatch pill and "Light" select), Color (Brand #FFFFFF, Accent #0073E6, Website background #FFFFFF as hex inputs with swatches), Form (Font: System (default), Style: Rounded) and a grey "Want more customizations? Change demo" box. The recurring preview stays in place.
- Open the Theme select → Theme menu
5. Theme menu open
A dropdown under the Theme control lists four presets, each with a two-tone swatch pill: Light (checked), Dark, Basic and Neutral. Nothing else on the page changes while it is open.
- Choose Dark → Dark theme applied
6. Dark theme applied
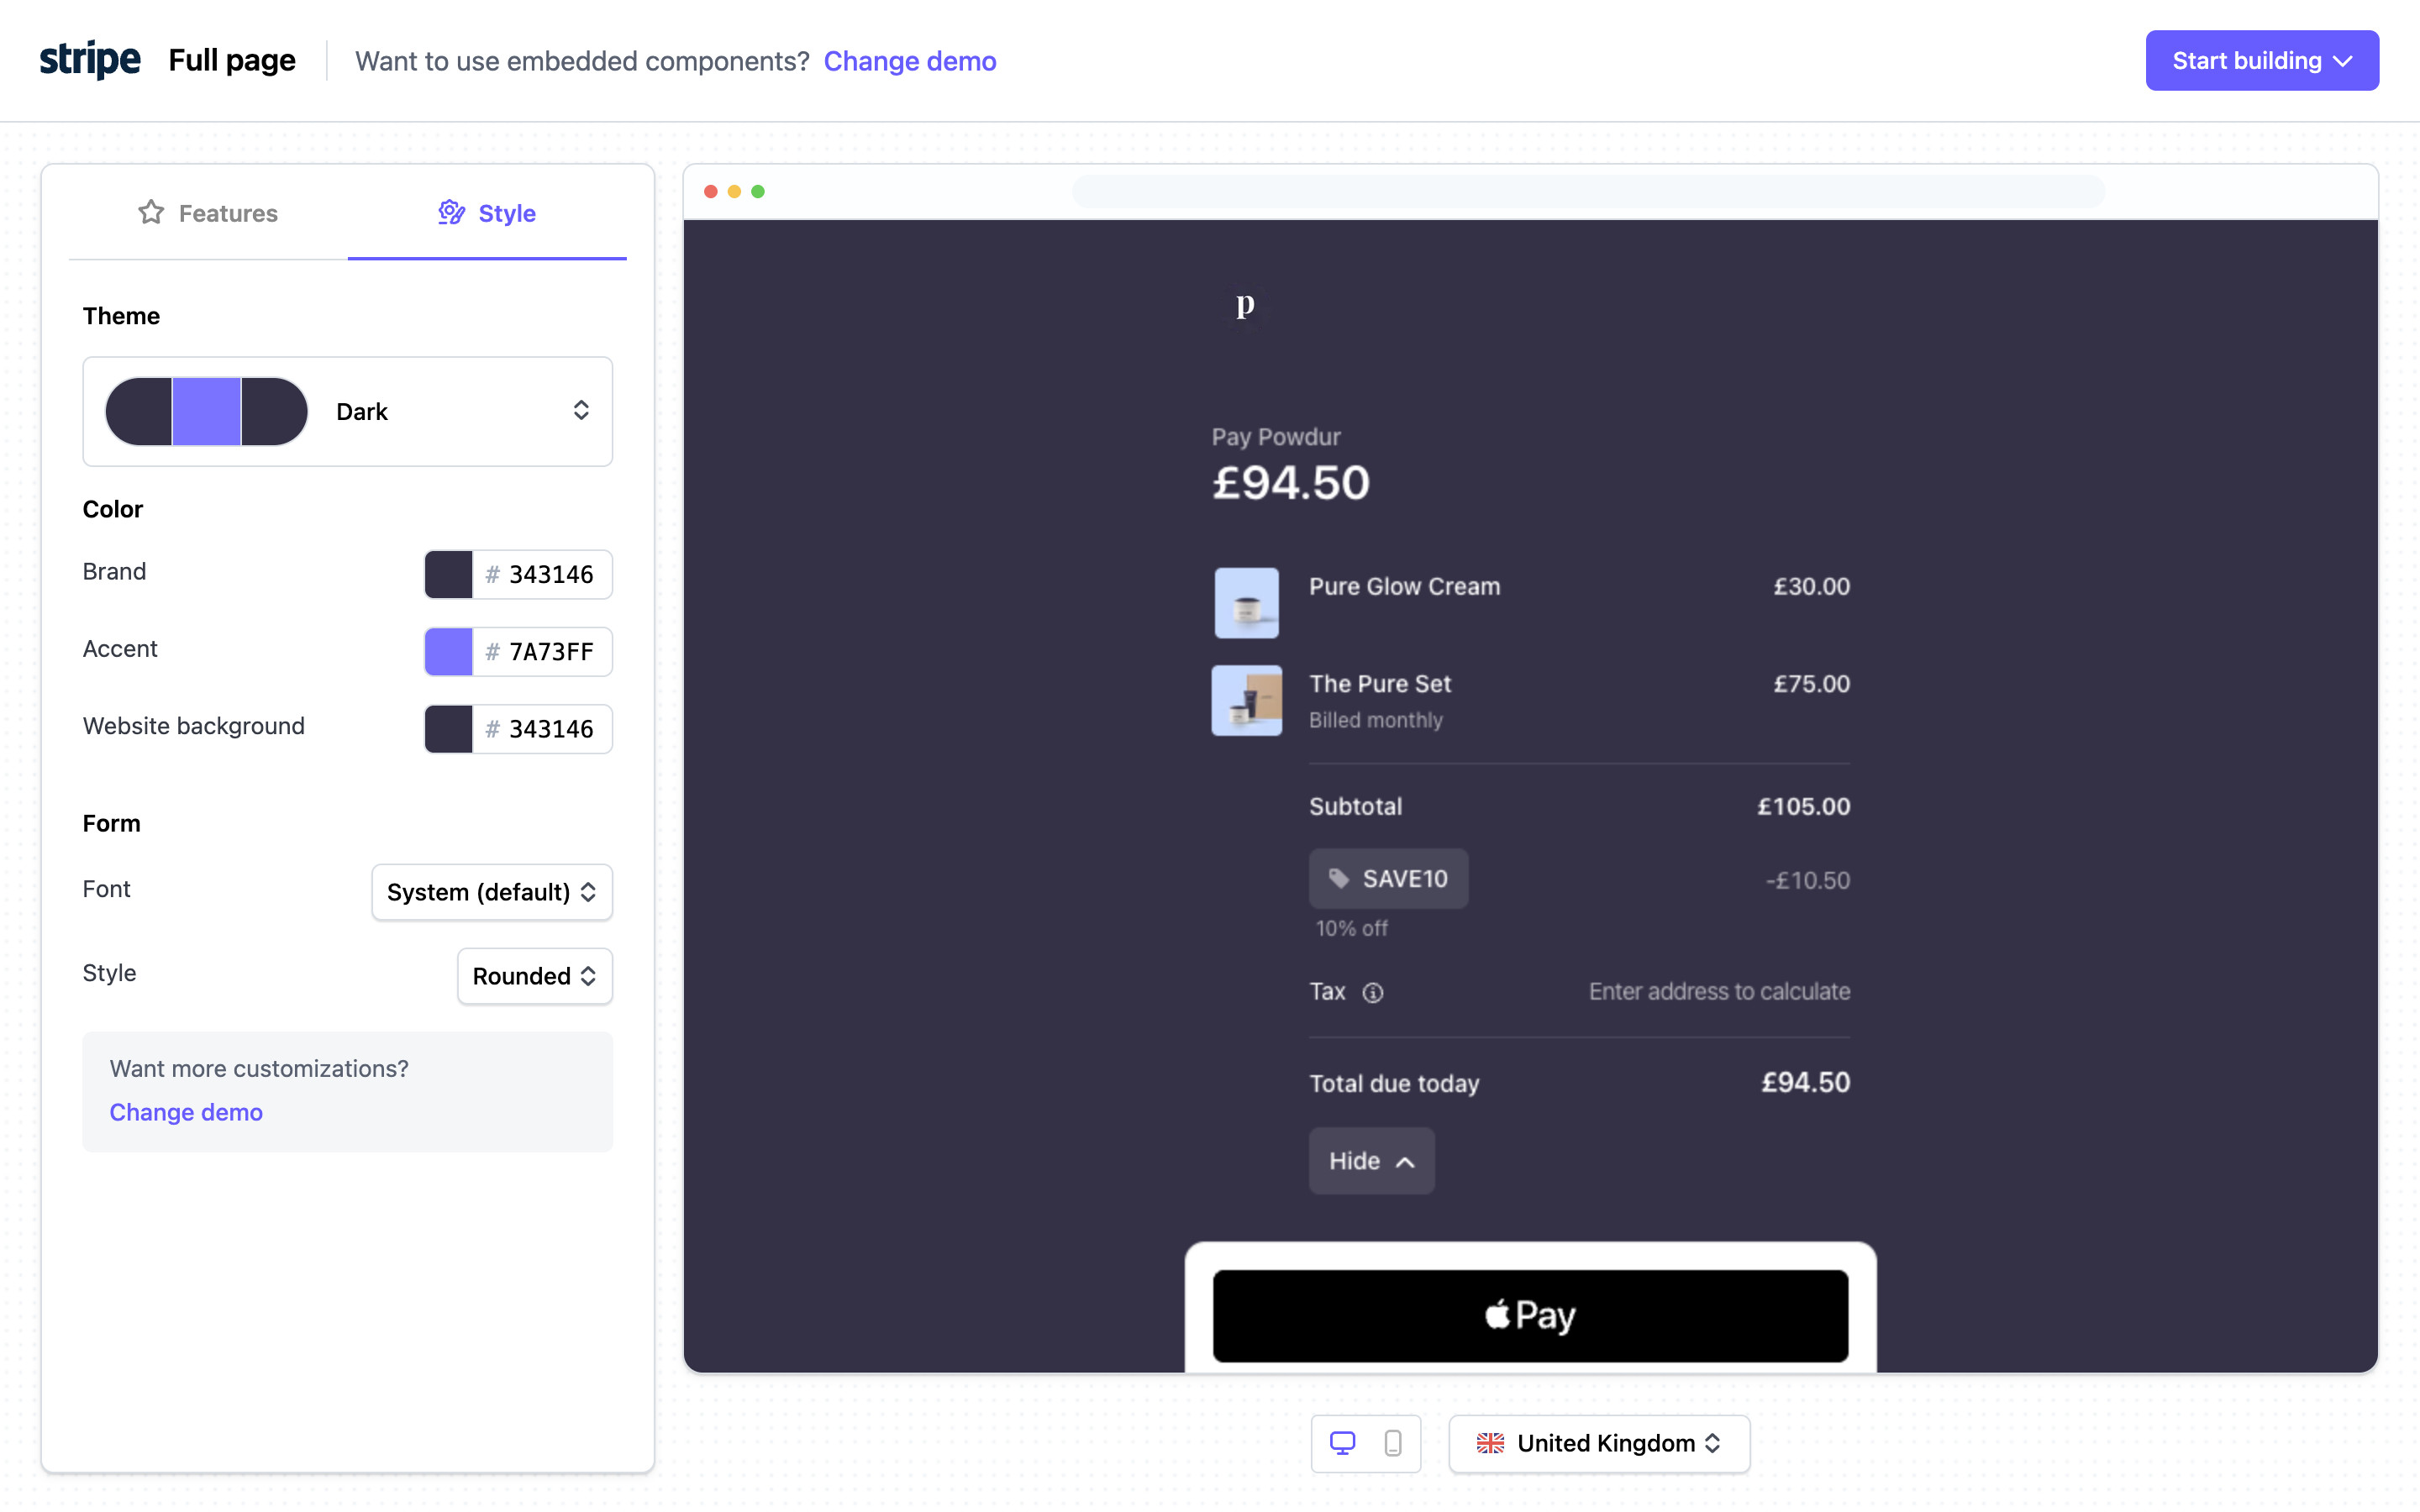
The theme pill reads Dark and the colour inputs change to Brand #343146, Accent #7A73FF and Website background #343146. The checkout preview repaints in a dark slate with light text; the Apple Pay button sits on a white panel at the bottom.
- Switch the preview to mobile → Mobile preview
7. Mobile preview, dark theme
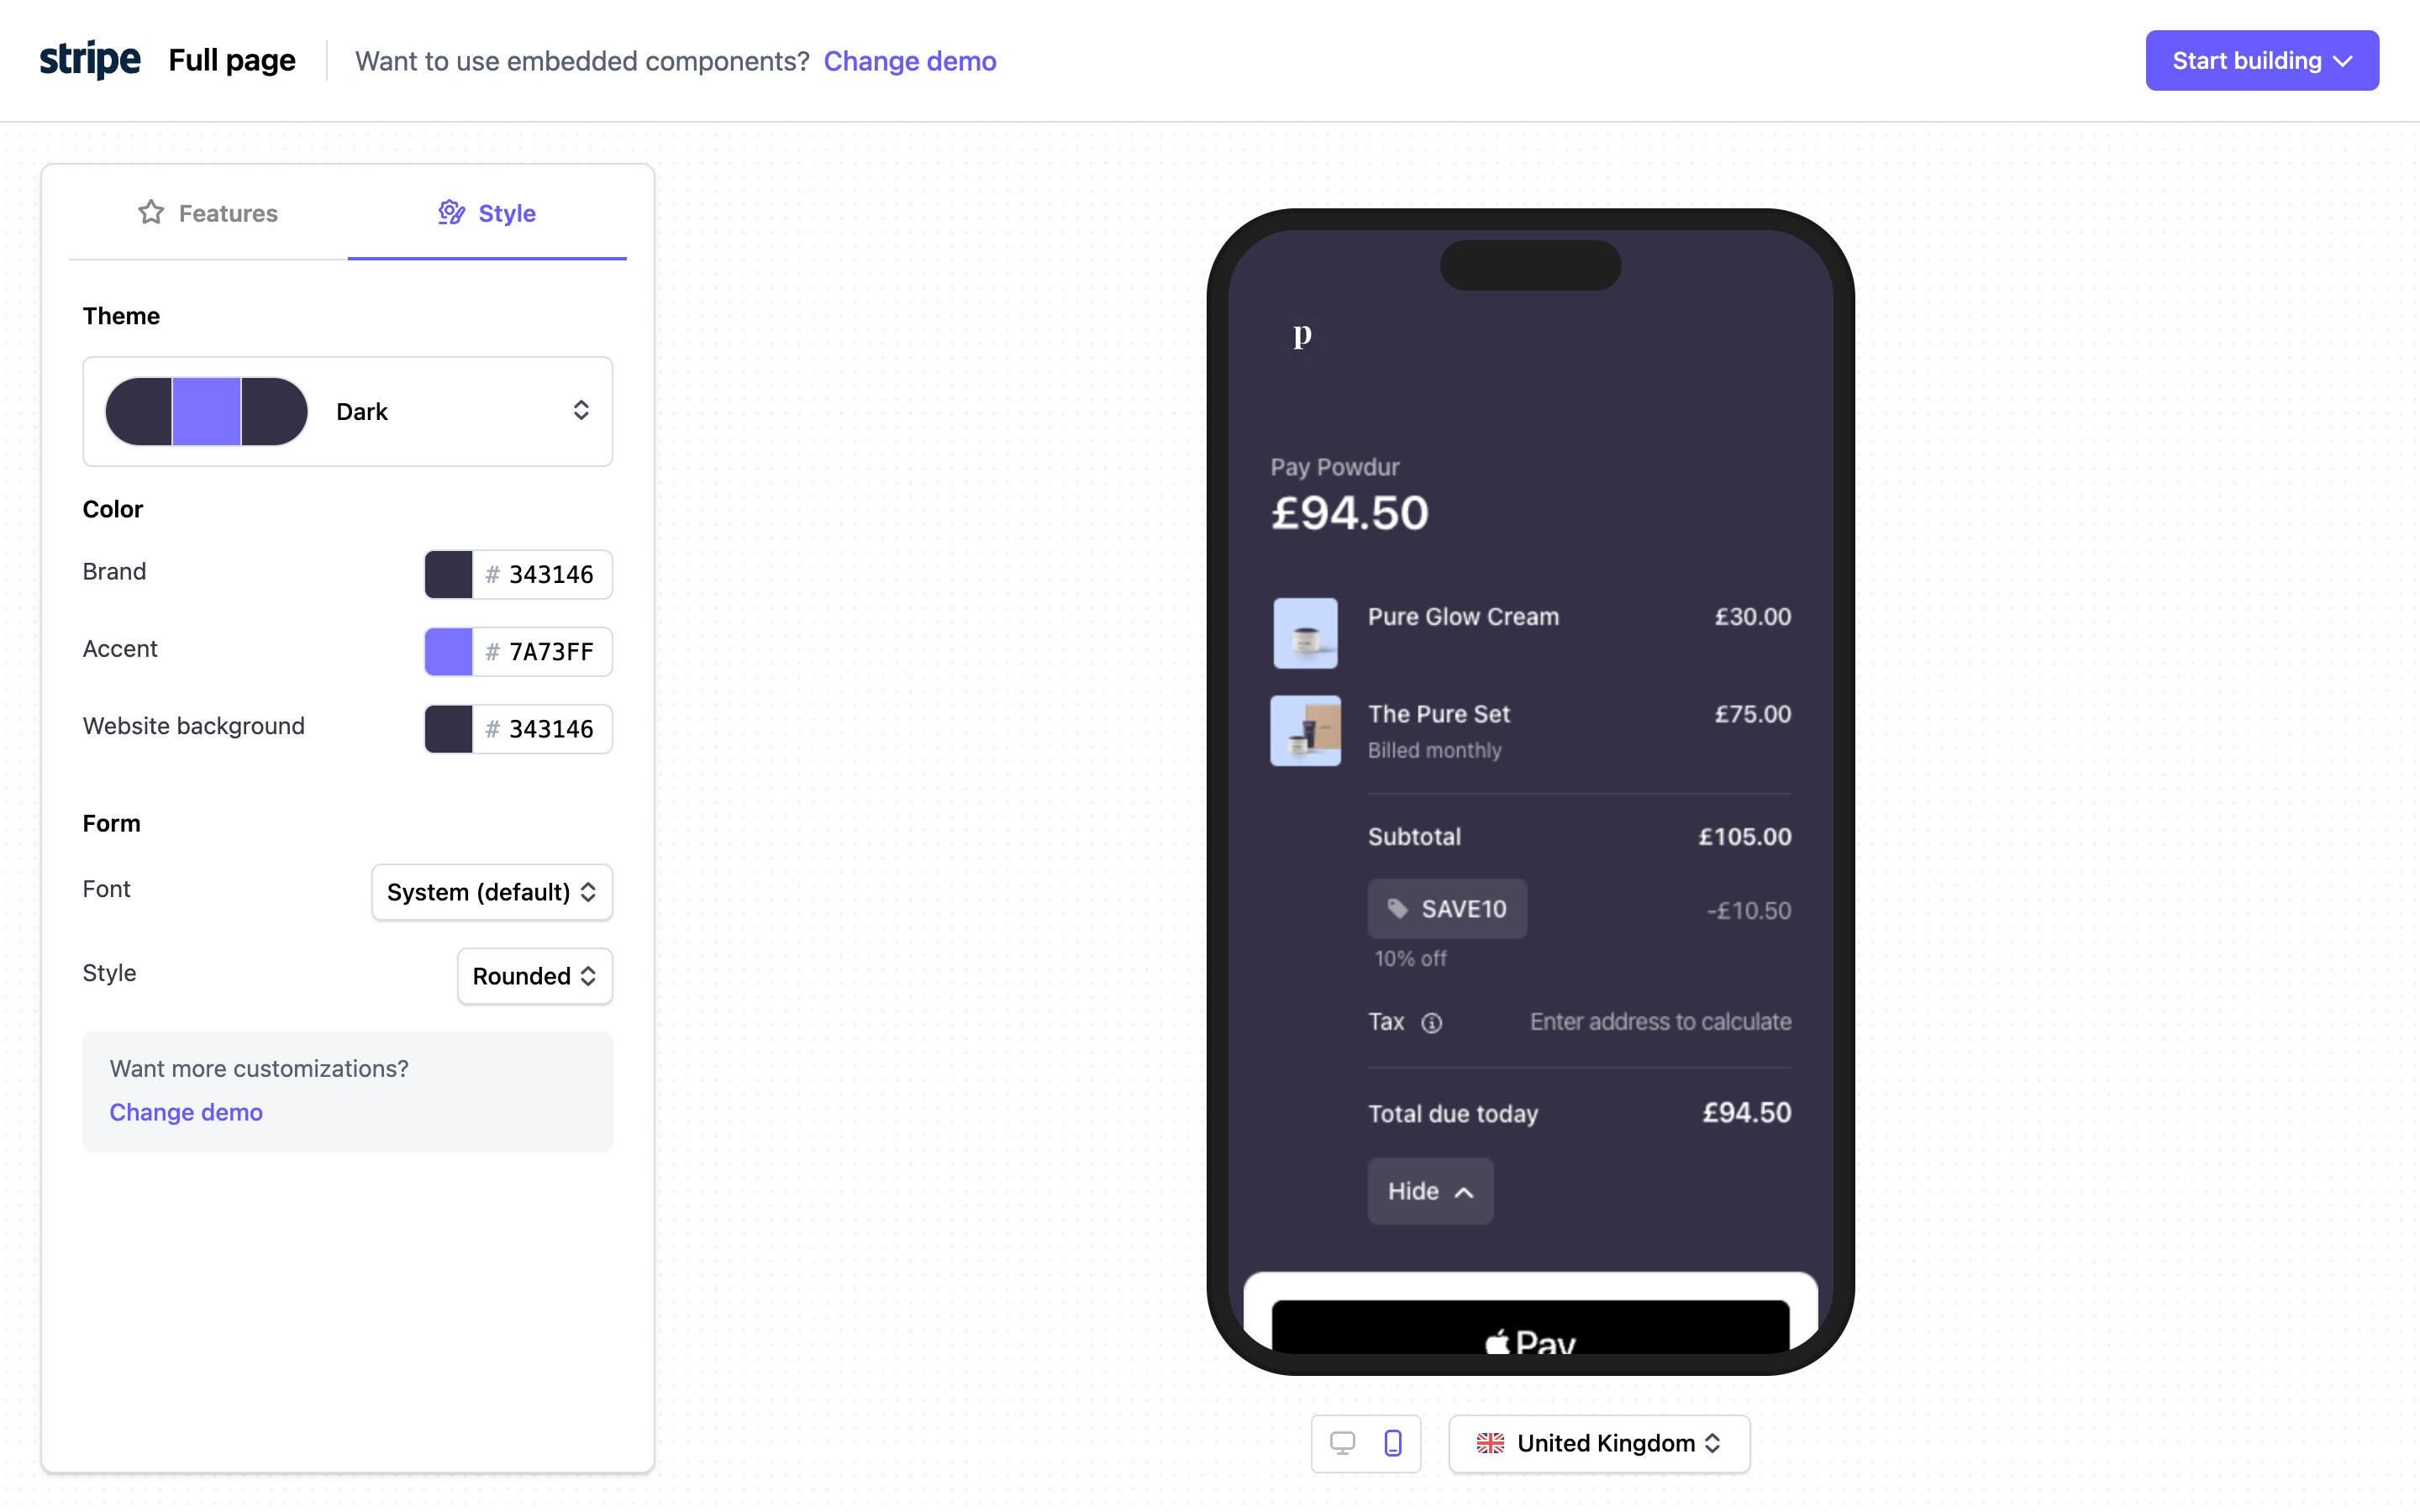
The device toggle swaps the browser frame for a phone outline with a camera pill. The dark checkout reflows into a single narrow column: order lines, SAVE10, tax and "Total due today £94.50", with the Apple Pay button cropped at the bottom of the phone.
- Click Change demo in the header → Change demo modal
8. Change demo modal, Elements selected
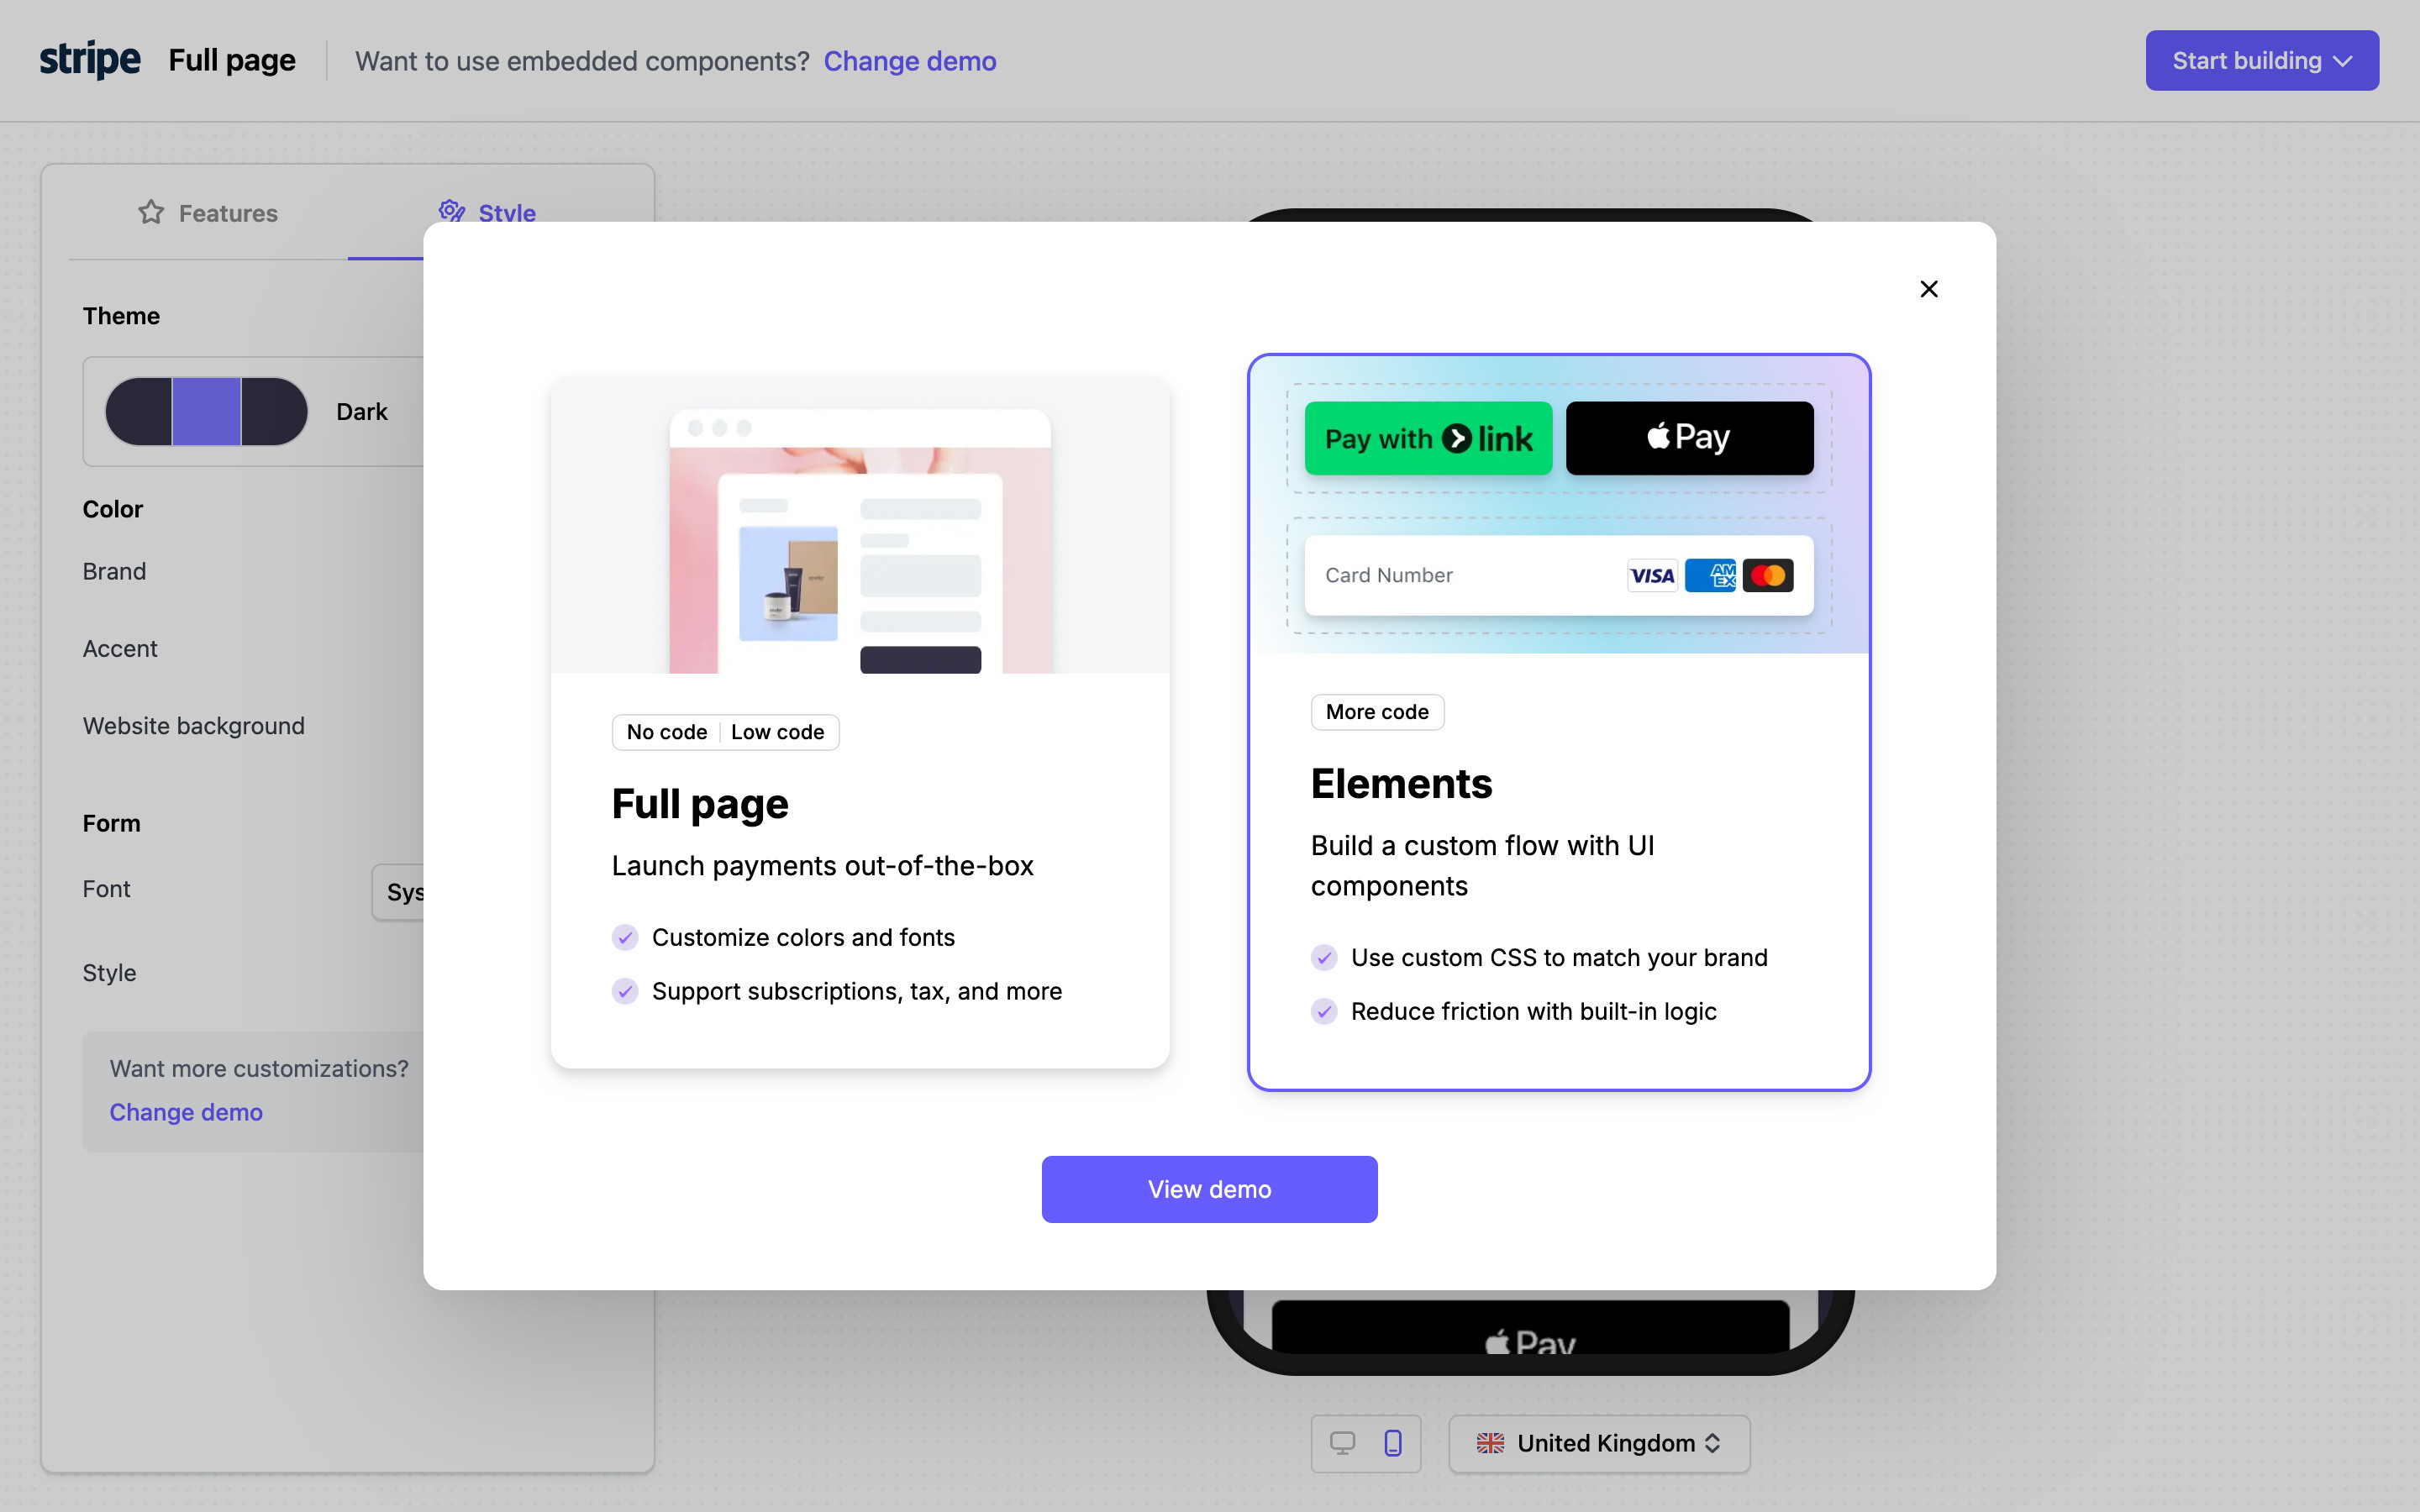
Change demo reopens the chooser as a modal over the dimmed playground (with a close ×). Here the Elements card has been selected: it gains the purple outline and a lilac gradient background while Full page returns to plain white.
- View demo → Elements demo
- Close the modal → Mobile preview
9. Elements demo
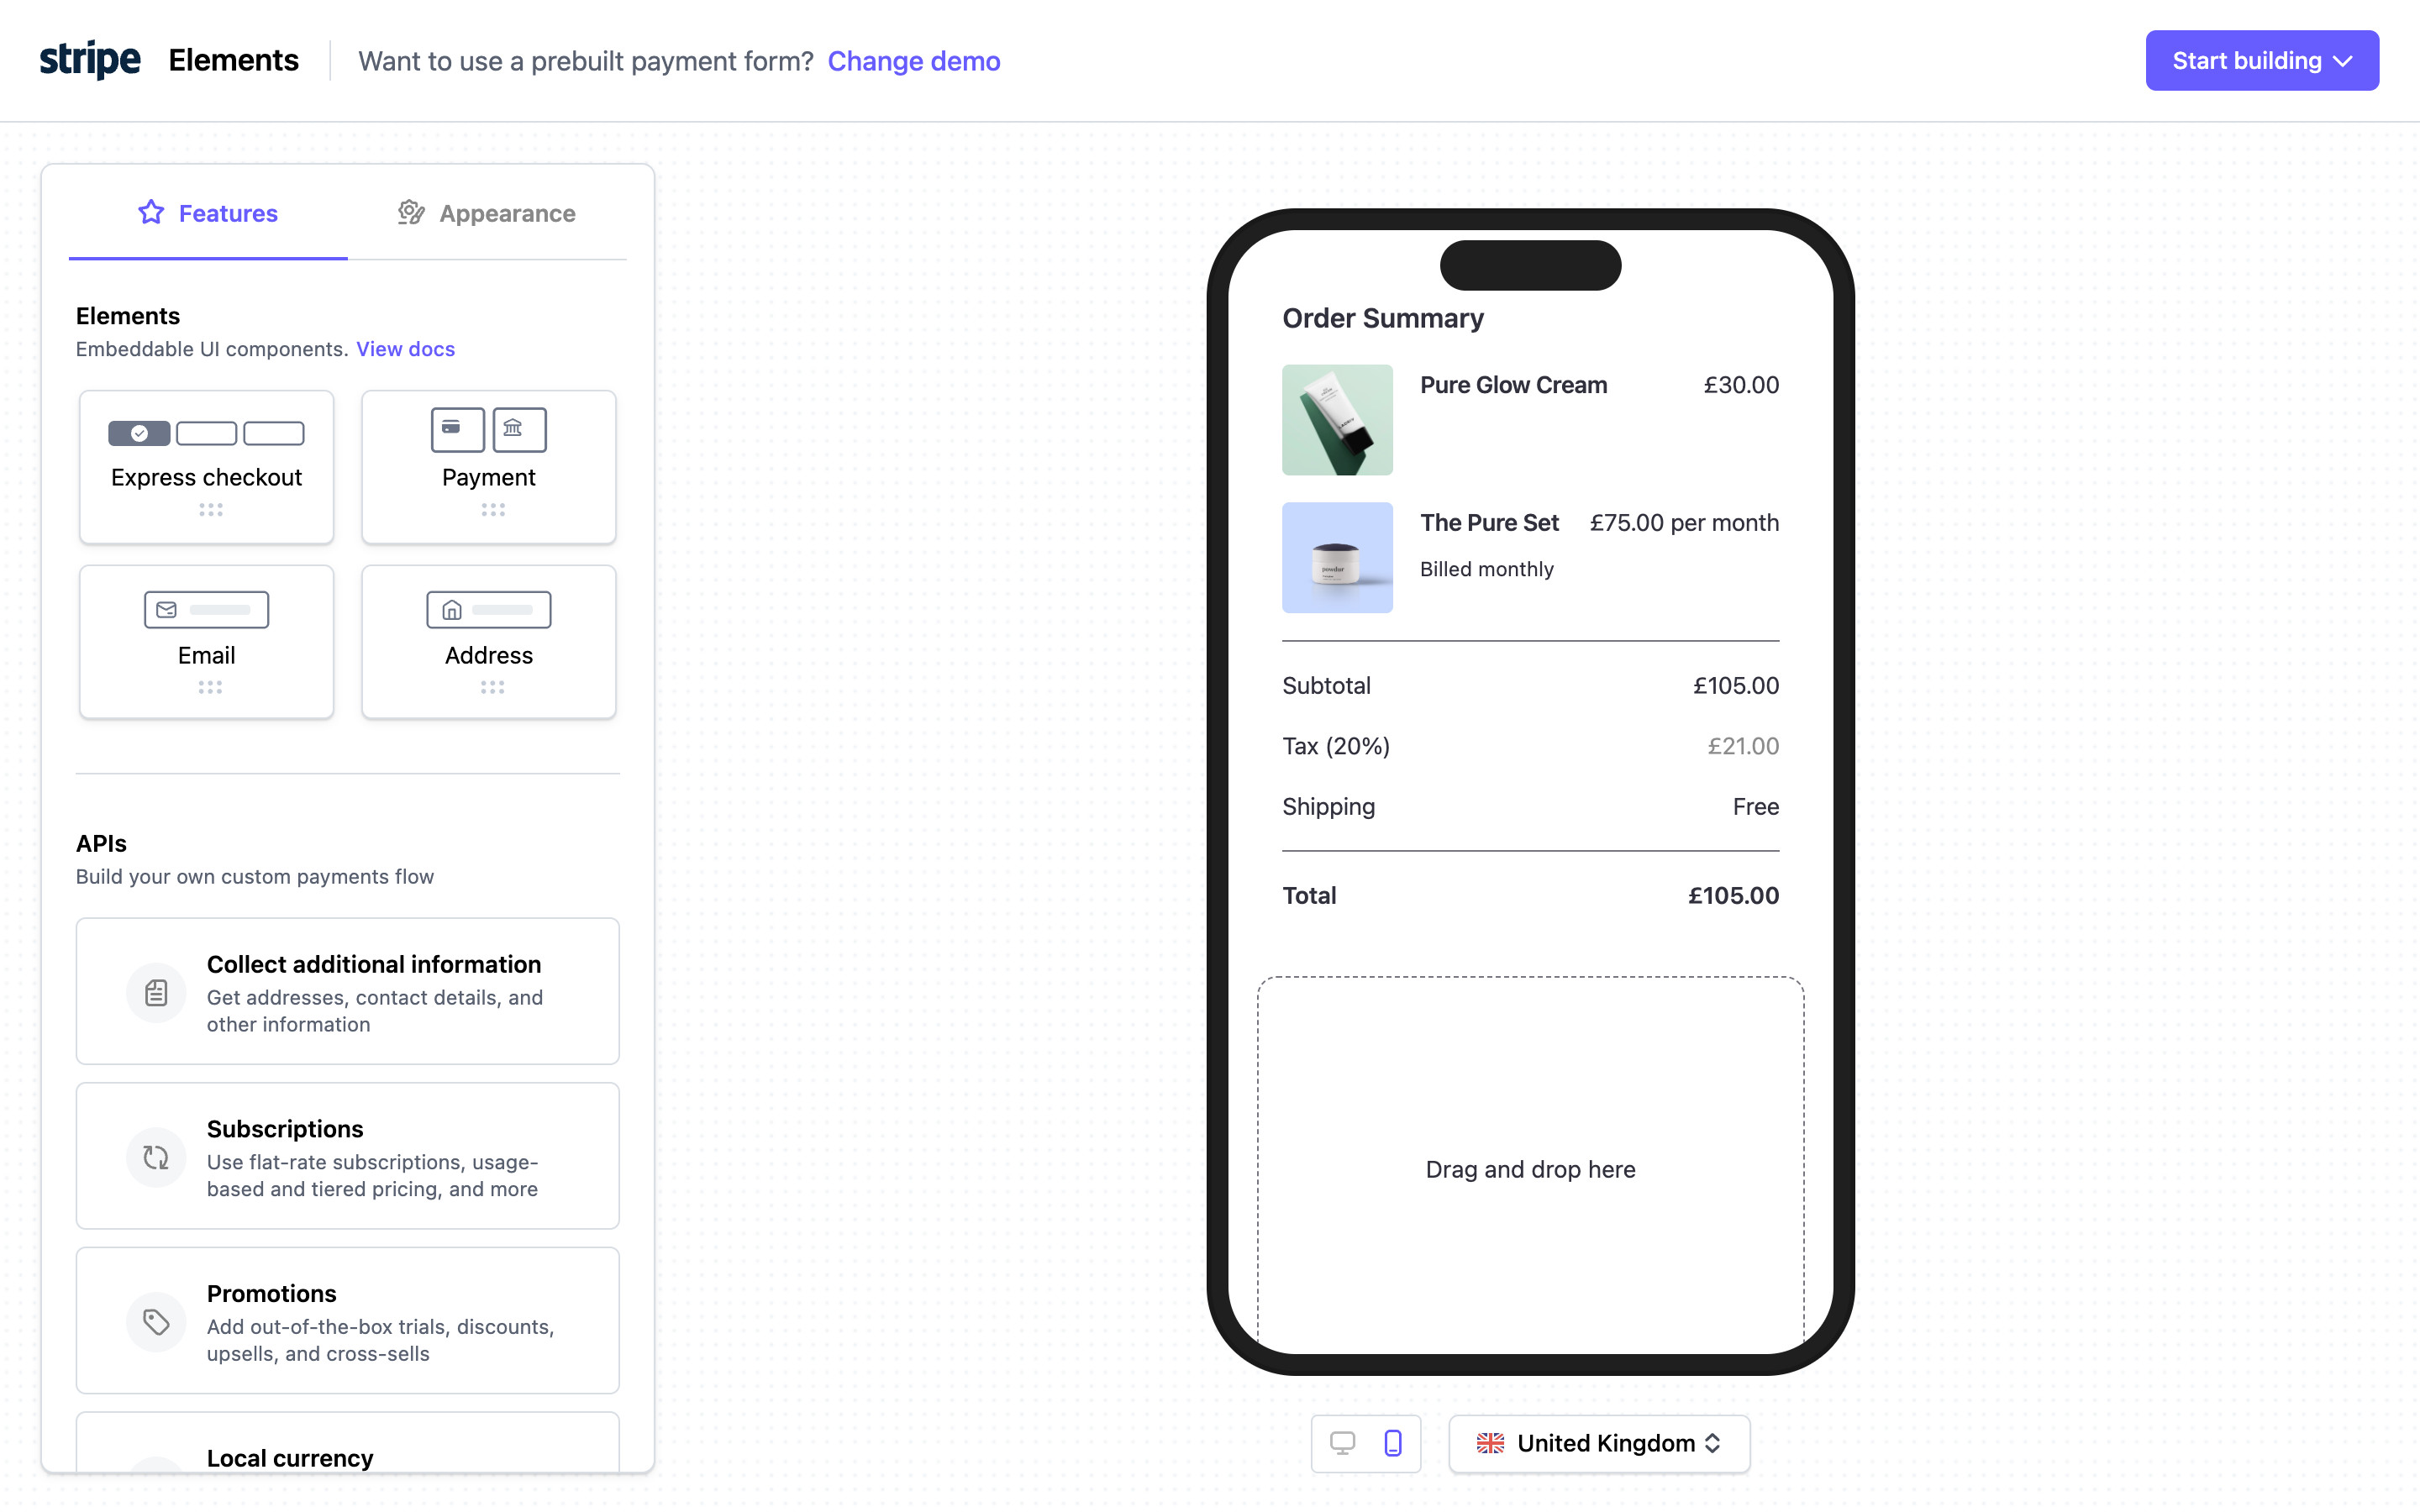
The header now reads Elements with "Want to use a prebuilt payment form? Change demo". The sidebar has Features / Appearance tabs, a grid of draggable Element tiles (Express checkout, Payment, Email, Address) and an APIs list (Collect additional information, Subscriptions, Promotions, Local currency). The preview stayed in phone mode and shows an Order Summary (£105.00 total including Tax (20%) £21.00) above an empty dashed "Drag and drop here" area. Nothing was dragged in.
- Drag an Element into the preview → Not explored
- Change demo → Demo chooser
10. Start building menu
Alternate from the Full page demo: the purple Start building button opens a white popover with two option cards, "Embed your prebuilt form" (Quickstart guide) and "Publish a Stripe-hosted page without code" (payment link from the Dashboard). Neither was followed, since both lead towards docs or a sign-in.
- Embed your prebuilt form → Not explored (docs quickstart)
- Publish a Stripe-hosted page without code → Not explored (Dashboard sign-in)